Saturday, December 31, 2011

Squidlets!

 Nope, not seafood.  Pork!
 It was time to cook the first large roast from our pigs.  But I didn't plan well, and the ham was thawed two days before I had a day when I could cook it with the timing to be done for supper.  So I hit the books and landed on this one:
In this book, (on loan from a friend....waves to Andy and Haley!) a must-read for anyone raising their own meats, is a wonderfully weird little recipe for pork squidlets.  Intriguing.  I detest shellfish, but love-love-love anything fried.  Deep fry it and I'll eat it!  The recipe called for a tenderloin, yet I had a thawed gargantuan ham roast (uncured.)  No problem, I just carved off a couple of hunks before settling the roast into the Dutch oven, browned in its own lovely fat and braising in some broth and garden garlic.

I cut the reserved meat into 1/4-1/3 inch thick slices, then cut "tentacles" into each piece.  Since I didn't follow the instructions for the cut of meat, why follow any of the other instructions?  Be adventurous!  Spontaneous!  Daring!  Learn from your own mistakes!
Next was the flavoring.  I mashed a few cloves of garlic with a mortar and pestle (mincing would've done the job, but, hey....) and added some salt and black pepper.  The recipe called for a tablespoon of each, which seemed like too much for me.  I used plenty of garlic, but cut the salt down to 2 teaspoons (still too much) and the pepper down to 1 teaspoon (not enough.)  Instead of olive oil, I added a couple of good spoonfuls of the lard I had melting to fry the squidlets in.
I stirred the squidlets in and let them rest and take up the garlicky flavor for a few minutes while the lard heated and I decided what to bread them with.
The recipe called for cornstarch.  I had corn meal made from my home grown Wade's Giant Indian Corn....it smelled divine....so I made a test batch of four squidlets after squishing them around in some corn meal on a plate.  Hugh was not kidding when he said to cook them for less than a minute. 
They were a bit on the crunchy side but definitely delicious.
For the rest, I added some whole wheat flour to the corn meal and carefully coated the rest, pressing them into the mixture and getting all the tentacles well covered with the flour.  I fried them in two batches and YOWZA!  Delicious!  This one is definitely a keeper, but be aware that they must be eaten practically standing in the kitchen.  Crispy, crunchy perfection on a chilly, rainy, last day of 2011.


Thursday, December 29, 2011

Elderberry pear pie.....oh, my!

Busy day, and I wanted pie, so I went back to my new "fall-back" meal of green beans and leftover pork.  It'll be a while before I'm tired of this one.  I found a quart of green beans in the freezer from last summer's garden and grabbed a hunk of this year's salt pork, pulled some cooked pork out of the kitchen freezer and I was good to go.  A quick meal that would allow time for the other major and oh-so-important food group:  PIE!

At this point I will tell you all that in the past couple of weeks, without trying, I've lost 2-3 pounds.  Yep, all the fat we've added to our diets lately is having the desired effect.  More fat, less carbs, equals jeans that fit.  And more energy in spite of the short, short late December days.  Our bodies can utilize the energy from good fats much more efficiently than that from carbohydrates.  If our diet is in the correct balance, we burn fat and store carbs.

Notice how few refined carbs were in tonight's meal.

I started by dicing up the salt pork (with one of my new razor sharp knives!  Yeehaw!) and putting it into a cold cast iron frying pan.
The cold pan is thus greased as the salt pork begins to release its lard.
While this is slowly cooking over a med-low flame, I made the pie.  I'd picked up a few over-ripe pears on clearance (the best for cooking with, but have to be used right away) and thought they'd go nicely with some of the elderberries I had in the freezer from this past summer's walks with the dogs.  I try to always have my picking pail with me....doesn't everyone?  *snicker*
The berries died the pears a lovely, yet strange, shade of hot pink but this pie goes down in history as one of my personal favorites.  The hubster likes the mock cherry (cranberry/raisin) pie best, but he liked this one, too.  I used about a third of a cup of sugar for this pie, along with a couple droppersful of stevia extract.  It was perfect.  The crust was all whole wheat, fermented for 24 hours at room temperature.
Meanwhile, the salt pork was slowly browning and sizzlin' on the pan.  Click this link for a quick mouthwatering tour of my stovetop.

I put half the crispy bits and rendered fat into a sauce pan with the frozen beans and covered them to cook for a while, then added the frozen pork meat to the frying pan along with some garlic and lots of salt and pepper.  Fried it a bit crispy this time....yum!
More details on how to make your own salt pork coming soon!

Tuesday, December 27, 2011

Stainless steel pots and good knives

While making soup from previously made and chilled bone broth a couple of weeks ago in my cheap ($35?) stainless steel three gallon pot, I noticed that the condensation on the outside of the pot (cold contents just set on the flame) was not cooking away as quickly as it should.  In fact, as the seconds ticked by, the sizzling noises were increasing, not decreasing.  A closer look revealed that as the gelled broth melted, it was leaking out of the seam at the bottom of the pot.

Yikes.  My dream of replacing my cheap stock pots with serious ones suddenly became an urgent necessity.

And I had a coupon.  What more could a gal ask for?  A restaurant supply warehouse nearby, a 20% off all purchases coupon with no expiration date, and a little extra moola in my pocket (thanks, L, and a big smooch to you!) and I was one happy camper.

Good stainless steel is really important.  Cheap stainless can erode into your food and bits can actually flake off.  If the bottom of my old pot were to separate as I lifted the boiling contents, I would have been badly injured.  I got a five gallon and a four  gallon pot.  I have decent one and two gallon pots, and can certainly skip over the three gallon size. 

Most people can skip the sizes I just purchased, but I make very large batches of bone broth and freeze it.  Cheese making is also best done in larger batches, as it takes the same amount of time to make a four and a half gallon batch as it does to make a one gallon batch.  Once all the kids are weaned or sold before weaning, I can have almost two gallons of milk coming into my kitchen every day.  I have no time to mess around.....I need to get that milk reduced into cheese for easy storage.  A gallon of milk yields about a pound of cheese, much easier to store for the following winter and spring.

This size pot came in handy when we had no power for several days.  My big pots lived on the woodstove, filled with water heating for washing up.

Wanting to make the most of my coupon, I also stocked up on some gadgets I needed, and some to replace ones that were very worn out.  Since we are all about meat right now, most of my new acquisitions had to do with meat....processing, preparation, cooking, serving.  OK, now I'm hungry again....
That little green lime squeezer will come in handy now that lemons and limes are cheap.  I will squeeze them into ice cube trays for use all winter, but especially next summer when lemons and limes are pricy and thirst is at its max.  I have about 20 of them awaiting processing.

Last but certainly not least, good knives.  One good knife is worth a dozen.....no, a hundred....poor quality knives.  I only have 3 good knives, and have to borrow Dad's butcher knife for processing along with his sharpening steel.  Now I have my own and I can't wait to get cookin'!
Can't wait to learn to use that sharpening steel, too.  I love seeing Chef Ramsey make it look so easy.

Normally, I despise washing dishes.  But I leave you now to go remove labels, packaging, and joyfully toss old stuff to make room for these lovely items that will likely never need replacing....ever.

Ahhhhhhh......contented sigh......

Thursday, December 22, 2011

Simple breakfast on the farmlet

A typical breakfast here...eggs fresh from our hens with melted Gouda from our sweet goats:
It doesn't get much better than this!  Real food.  Yum.

Wednesday, December 21, 2011

Best. Pie. Ever.

According to the hubster.  Last night I told him, bag of fresh cranberries in hand, that I was going to make a cranberry pie.  "Why?" he said with distress in his voice at the waste of a perfectly good pie opportunity.  I just smiled and continued mixing up the crust.

I like to make up the crust in advance and let it sit for several hours, up to a full day, at room temperature.  This allows the phytates to neutralize, allowing for better digestion and to allow for more nutrient absorption...particularly minerals.  Phytates are germination inhibitors present in all seeds.  These natural substances can be rather irritating to the digestive tract for some people and also block absorption of some key nutrients.  I soak all grains for us and for my animals for this reason.  Mixing the water into the crust mix and letting it sit accomplishes this.

Today, I rolled out the crust and assembled my ingredients while the oven was heating to 450 F.
After picking through the cranberries and discarding the mushy ones, I had about 3 cups, which my recipe for mock cherry pie called for.  This recipe came from one of my WWII era cookbooks that I just love for ideas for making real food on a budget.  I ran the washed and sorted cranberries  through the blender to coarsely chop them, in 4 batches.  Then I mixed in about 1.5 cups of organic raisins, 1.25 cups water, a half cup of sugar, two droppersful of liquid stevia extract, 2 Tblsp flour, and a few shakes of salt.  Oh, and a small glug of homemade vanilla extract, maybe a tsp or less.  This was thoroughly mixed and added to the bottom crust.
Next came the top crust, and here is proof that you don't have to be great with the rolling process....just trim later: 
I trimmed the excess and turned it under....I like a thick crust, but you can trim more closely for less crust.
Here it is, ready for the oven:
And before I could take a bite, the man who was buying some chickens from me showed up...by the time I got back in the house, my husband was raving over the pie, saying it was the best pie he's ever eaten!  Cranberry pie!

Must be the lard in the crust....

Tuesday, December 20, 2011

No time to cook properly.....

No time to cook the way I wanted to today....busy getting errands done plus more pig week work.  I got half of the C grade lard done.  It is nicely brown and will add some flavor to pie crust for pot pie.  Bacon grease would be better, but I have a love affair with bacon-feta popcorn.  Gotta keep getting that vitamin D!

I also had to pick the meat off the bones that simmered for a day and a half with a couple of glugs of apple cider vinegar (to extract as much of the mineral goodness from the bones as possible).  I mashed the bones and other unidentifiable bits that were left over, using a potato masher to break everything up into hen-beak-sized bits for the laying flock.  Nothing is wasted.  Those bones, marrow, bits of meat and fat, will all become eggs for our table or rooster for our stew pot.

I ran out of time to make a decent supper.  Or so I thought.  Wanting to make the bland boiled meat a bit tastier, I diced up some salt pork while two cast iron skillets heated up.  The salt pork bits were divided between the skillets and cooked over a fairly low flame until some fat released and the pieces were nicely browned on all sides. 

To one skillet I added an entire bag of French cut green beans, to the other skillet I added some of the boiled pork, seasoning it well with garlic powder, rubbed sage, black pepper.  Both were generously sprinkled with sea salt and cooked for 10-15 minutes, stirring occasionally. 
Oh, my, was this quick meal delish!  Every bite was worthwhile, but then....oh, golden browned crispy wonderfulness!  Any bite containing a bit of salt pork was just heavenly!
Memere really knew what she was doing when she started so many dishes with salt pork.  Instead of just greasing a pan, or simmering or steaming veggies and adding butter, grease the pan by sauteing up a bit of salt pork first.  The depth of flavor is unrivaled.  It is absolutely worth the extra small step.

If you don't have access to salt pork from pastured pigs, you can simply buy any fatty cut...or trim some fat with a bit of meat from chops or a roast that you purchased.  Put a thick layer of salt in the bottom of a bowl or jar, add the pork, and add more salt.   Layer more pork and salt if you have it, or just salt one piece.  Cover it and put it in the back of the fridge for ten days or more.  It should develop a nice brine to cover it.  If not, you can add a little water and some more salt after a few days.  How much salt?  Dunno.  Wing it, but be generous.  If you think you may not have used enough, simply freeze the salt pork after 10-14 days or so, using the sniff test first.  It is hard to ruin salt pork.  Just be sure to use lots of salt and make sure it is well covered with brine for the bulk of the curing time.

I have about four gallons of salt pork brining now....will it be enough to last the year?  I hope so!  Maybe not, after tonight's quick and cheap meal....the hubster was asking for seconds, and so was I.  *contented sigh*

Sunday, December 18, 2011

Pig Week: Lard, glorious lard!

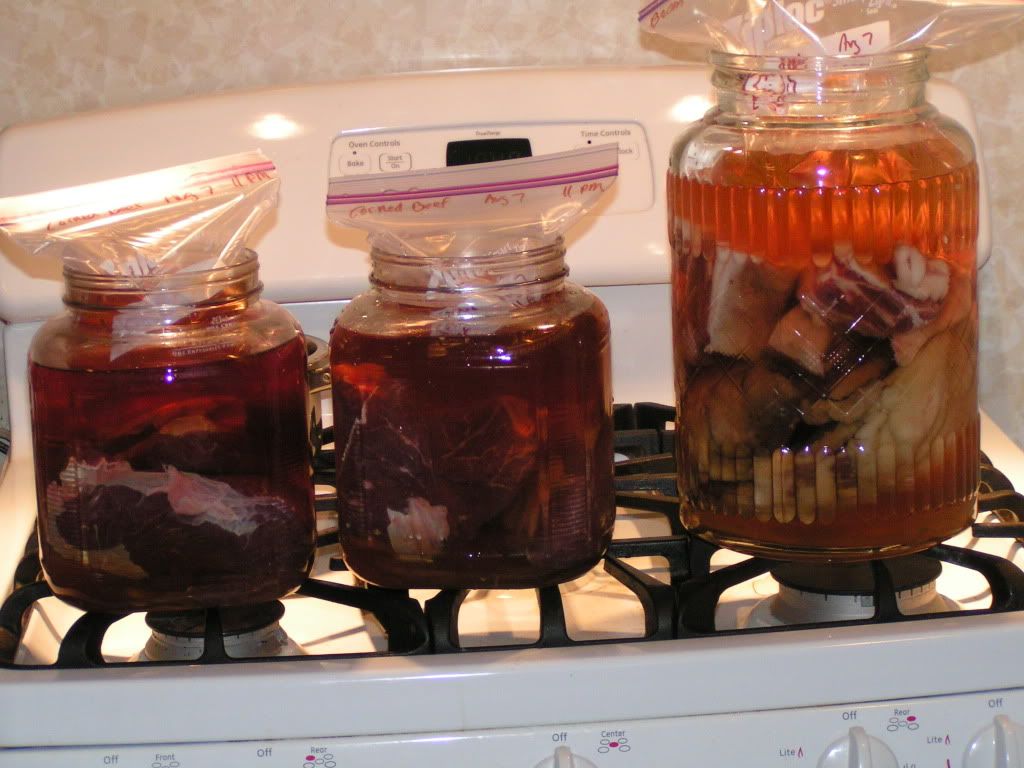
This story will be told in reverse order.  This is the first chance I've had to sit and write about it, I've been that out-straight-busy with the tasks of Pig Week.  But what an amazing week it has been!

Everything is finally safely in the freezers, with the exception of the lard...rendering this crazy amount of lard is taking all week.  But what a lovely task!  With the possible exception of the bacon, lard is the most precious commodity of all our hog bounty.

The fat from pasture raised pigs, fed properly, has a perfect balance of saturated fats to monounsaturated fats....the same balance that is found in the cell walls in our bodies.   It is also loaded with the very valuable fat soluble vitamins, particularly vitamin D.  Although I'm a big believer in supplementation because the food supply most widely available in this country is grown on such depleted soil.  Also, fast growing hybrid varieties don't have the time to take up the nutrients of the older, slower growing and more deeply rooted plants grown in past centuries.  It is best to get your nutrients from your food whenever you can, but that is not always possible.  Fat soluble vitamins are particularly difficult to find in supplement form, so pastured egg yolks and pig fat are particularly valuable.

If you can't raise pigs yourself, find a farmer who raises them on pasture and buy some fat to make your own lard.....it is so easy!  The finest lard comes from a flat piece of visceral fat that lines the abdominal cavity.  This fat is very saturated and makes the finest, flakiest, most  tender pie crusts, cookies, and other pastries.  I render this separately from the rest of the fat and mark it with the words "leaf lard."  That piece of fat is called the leaf lard, and a butcher worth his salt will know exactly what you are asking for if you request to purchase it.

Fat from the rest of the pig can be used to make lovely lard as well.  I save the belly fat, well marbled with meat, for bacon, and a bit of the forward end of the bacon is cut into chunks for salt pork.  The rest of the fat, particularly that inch and a half layer of back fat, is cut into strips and ground up for rendering into the majority of the lard that we will get from our pigs.

Are you sitting down for this?  Many people throw this fat away!  Egads!  So ask away, you will eventually find some and might find it for a pretty good price. 

You can see the leaf  lard in the upper right part of this side, above the ribs.  On the left side of this hog you see a wide strip of fat along the back.  This is what will become the bulk of my lard for the year.

We found a big hand grinder on clearance at TSC this fall and bolted it right to our butchering table (a homemade table found on the side of the road with a "free" sign on it!  My favorite kind of equipment, after the stuff with "clearance" on the sign.  It was made with folding banquet table legs, heavy scraps of plywood, and a hollow core door.  Sturdy and storable, perfect for butchering, and much better than the scrap of siding and saw horses we'd been using.)  As the fat was trimmed, it went straight into the grinder and the ground up fat went into a six gallon pail....after my 2.5 gallon Dutch oven was filled.

If you don't have access to a grinder (I have another one that attaches to my KitchenAid stand mixer that I use for small quantities of meat, as in making ground beef from a roast) you can use a sharp knife and cut the fat into the smallest dice you can manage.

There are several methods used in rendering lard.  For smaller amounts, a crockpot works just fine.  For serious amounts, my favorite is the cast iron Dutch oven.  Filled with ground fat, it goes into the oven for several hours at 170-200 F.  The lower temp is used if I have lots of other things to do before dealing with the melted fat, and the higher temp is used when I want to get several batches done in one day.  I don't want it to boil and possibly leak out for fear of a grease fire.  I don't overfill the pot and I keep the temp below boiling.

If you don't have a big crockpot or cast iron Dutch oven, you can use any large stock pot on top of the stove.  For this method, you'll want to put some water (an inch or two, maybe) in the pot and put the fat in and bring it to a low simmer.  Don't fill the pot so much that it could boil over!  The water will prevent the fat from browning or possibly burning on the bottom, darkening and flavoring the lard.  Neutral lard is the best for most uses in cooking, so you want to take care with this method.


You'll need to strain the rendered lard.  I use a canning funnel, a fine mesh tea strainer (gauze or cheesecloth will do in a not-so-fine mesh strainer), and a metal measuring cup with handle to scoop the liquid lard out of the pot with.  Lots of newspapers will keep the grease from taking over your kitchen, but dispose of them carefully....burning is the safest method.

I mark my canning lids with either "leaf lard," "lard," or "lard B" or "lard C."  Leaf lard is from the leaf fat and is the finest.  Just the word "Lard" indicates the best, purest lard that is scooped out of the pot from the oven and will cool to a pure white.  "Lard B" is the fat that is scooped out after the fat goes back into the oven for more rendering and is a little darker.  I will gather all the fat that has been rendered twice into one pot and render it one more time, even pressing it through a larger screen mesh colander to get the darker, lower quality of lard.  This I use when the rest is gone, or to brown meats in, as the meaty flavor is fine for this application.  It can also be used in making biscuits and pie crusts for pot pies, when a meaty flavor complements the quick breads served with a stew.

Lard B:


A few glass peanut butter jars are filled to give as gifts to some who helped with the harvest.  If the jars are warmed first by placing them in the warm oven for a few minutes, and then filled with hot fat and the lids are sealed right away, the jars will seal and can be stored at room temperature.  Any jars that don't seal go into the fridge to be used first.

Vitamin D performs many critical functions in our bodies.  Did you know that you are much less likely to sunburn if your vitamin D levels are nice and high?  Get some lard from pastured pigs into your diet.....you'll be amazed at the flavor and texture of the foods you make with it, too.  I rarely tell guests that I've used lard in my cooking and it is always fascinating to me how they eat the foods like they are starving.....their bodies know what has been missing.

Thursday, December 8, 2011

Three days and counting....

Got a second gambrel and pulley hoist:  Check!

Four pie crust mixes made for fruit pies:  Check!

Two pie crust mixes made for quiche:  Check!

Oatmeal cookie dough and spice cookie dough made:  Check!

Cheese cracker dough made:  Check!

All remaining miscellaneous pork from last years' pigs simmered, removed from bones, cut up, bagged and frozen, broth strained and cooling on the porch:  Check!

Two gallon batch of chevre started for cheesecake and chevre with berries:  Check!

Two batches of soda started and by the woodstove (black cherry and cranapple):  Check!

Me pooped already:  Check!

Wednesday, December 7, 2011

My 1940 Kitchen

The Pig Day countdown is well underway.....only 5 more days until the four hogs we've been raising since spring start on their trip to Freezer Camp.  We have arranged for a couple of guys, Felix and Devin, to take  care of the dirty work in exchange for one whole pig.  We'd hired them last year for the first two pigs we raised and were very pleased with them and made the plan for the four pigs.....they didn't think their landlord would be pleased if they raised a pig in the cellar.

We also have two friends who hunt coming, bringing a critical piece of equipment:  guns.  At least one of the wives is coming, and another friend of mine will come to visit and to join us for lunch in the festive atmosphere.  My folks will come for food and Dad will help (at least supervise!) with some the messy work.  That brings the count to 10 or 11 people.

My plan is to mostly stay in the kitchen, barefoot, where womenfolk belong.  (HA!  As if...!)

Seriously, preparing good nutrient-dense food for all the hard workers, out there in the December in New England weather, is a very important job and I start today.  Actually, I started some time ago when I made the corned beef.  Right now all that lovely grass-fed beef is boiling and will be chopped for the breakfast meal:  Corned beef hash with our organic potatoes, Lumberjack quiche with our eggs, goat cheese, swiss chard, onions, and more corned beef (since we don't have any bacon....yet!), and chevre lightly sweetened with local raw wildflower honey and covered with raspberries.  Lots of protein and good fats and just a touch of carbohydrates to keep the body fueled for several hours of hard work.

On today's job list is also making some mixes to reduce the workload later in the week:  pie crust mix, cookie dough (I may have to roll some oats, gotta check....ground the flour last week and froze it), biscuit mix, and crust mix for a cheesecake.  If there is time, I may make the soda today, too.  Oh, and more chai  tea concentrate....that gets better with a few days of aging.

So much to do!  My list is on the fridge, and there seems to be more tasks than time.....gotta run!


Plummy....

....came into heat yesterday.  A flagging tail is NOT what I wanted to see, and there she was, waving at Dorian in a light rain.  Plum is pure sweetness and will melt in a heavy fog, never mind rain.  We opened the gate to let her in and Dorian shot out of that gate like a Thoroughbred out of the starting gate....and quick as a wink Peter caught him by the horns and shoved him right back in.  In the struggle, Plum slipped into his pen, where she wanted to be.

We left them for the morning and took Plum out before Peter had to leave for work, since the forecast was for more rain.  It is pouring out right now but when we go out to do chores, we'll check for flagging tails and if needed, we'll stand in the rain like real farmers.  Then Plum will go back in with the rest of the girls and we will hope for the best.

We won't have a flood of babies all in one week now, but hopefully all in one month.  We'll know in three weeks, if Plummy doesn't come into heat again.  Here's hopin'!

Monday, November 28, 2011

Making Corned Beef

http://i772.photobucket.com/albums/yy4/freemotion1/food%20preparation/briningbeefandbacon005.jpg

I took the plunge.  I made the brine yesterday from my old cookbook from the 40's.  The bacon recipe called for 100 lbs of bacon and the corned beef recipe started with "Scrub a good oak barrel thoroughly.  Put as much fresh-killed beef as desired in barrel....."

I had to cut the recipes down.  Way down.  I was using two one gallon jars and one 2 gallon jar, since all my other big jars are occupied right now.

I made the brines yesterday so they could cool down for a day.  The proportions I used are as follows:

Bacon brine:

2 lbs salt (used kosher salt)
12 oz brown sugar (I added molasses to white sugar)
3/4 oz salt peter (LEFT THIS OUT!!!!  EEK!)
1 gallon water

I heated it to melt the salt and sugar and left it covered for a day.

The bacon is some stuff that accidentally got left in the kitchen freezer when the bucket of bacon went to the butcher for brining, smoking, and slicing last year.  I decided to take the plunge so we can decide if we want to attempt making all of our own bacon this year.  The butcher charged me $2 per pound!  Looks like we could have a lot of bacon this year, too.

Corned beef brine:

1 1/2 lbs salt
1/2 lb brown sugar
1/2 oz salt peter (see above!)
1 gallon water

The corned beef will sit in the downstairs fridge for ten days and will be tested and if done, frozen for future meals.  I used 7 lbs of pastured boneless beef ("peeled knuckle.")

The bacon recipe says it can be kept in the brine for a year, or taken out after five weeks and smoked.  I'm way past that now but we may still attempt to smoke it.

Both required weighting the meat down...it floats and part is above the brine otherwise.  My mother used to use a big scrubbed rock in a crock.  With the jars that do not have a wide opening, any rock that fits in the top will slip down the side.  So I reluctantly broke my no plastic rule and filled ziplocs with some of the brine (in case of a leak, which would dilute the brine if filled with water).

The corned beef is then cooked by boiling it.  You can add root veggies such as big chunks of carrots, turnip or rutabaga, potatoes, and onions and wedges of cabbage for a New England Boiled Dinner.  Or you can slice the meat for sandwiches or have some with your morning eggs.  Or my personal favorite, corned beef hash:
http://i772.photobucket.com/albums/yy4/freemotion1/food%20preparation/cheesepressandcornedbeefhash005.jpg

Since taking this pic, I discovered that it is much, much better if the diced potatoes are partially browned first, then add the diced beef and lightly brown it as the potatoes finish browning.  When I put them all in at the same time, the meat dried out a bit.  Probably because it was pastured so a lot leaner than what I was used to from the store.  I like things crispy, too.  Either way, it was delicious.

(This was made in August, before I started this journal....I have another batch of corned beef brining now.  Super easy and super yummy!)

Sunday, November 27, 2011

Simple Home-made Cheese Press

I am NOT a carpenter.  I made this while my very first cheddar was culturing and renneting, so I slapped it together very quickly and never bothered to re-make it.  You can see that it is off-center and I didn't use the best wood.....but everything was something I had here already.  I eyeball the press from every angle when I load it, to make sure the arm is straight up and down from every angle so as not to get a crooked cheese.  Cleanliness of the press is not important, as the cheese does not come into contact with it.  Cleanliness of the mold and follower is the critical part, and what the mold is set onto and into.

The two different size wood followers are for the two sizes of molds that I have.  The shorter one for the bigger molds, the longer one for the smaller molds.

 Here is a Gouda in the mold getting ready to be pressed.  Use a pan big enough to collect the whey and spread it out so your cheese isn't sitting in whey, which could happen with a smaller container.  Those are canning jar rings that it is sitting on.  In the background is a plastic "ice cube tray" cover for a standard commercial florescent light fixture that is easy to cut to size to drain/dry cheeses on a plate or in a box, with the addition of a mat.  The pieces go into the dishwasher if not too big, top rack.  This can be used under the mold, too, but I recommend two layers.
When I first made the press, I used this ten pound weight with a dog collar.  I put my bathroom scale on the base of the press and marked the lever arm....to increase the pressure, simply slide the weight further away from the hinge, to reduce the pressure, slide it towards the hinge.  I marked it at 20, 30, and 50 lbs.  For 10 lbs, I put the weight right in the follower and not on the arm.
I made the molds from containers I got at a restaurant supply place....they are PERFECT as molds and followers.  I have some shorter ones for a 1-2 lb cheese, used a lot in my first year with one goat but I haven't made small cheeses in a couple of years now.  It is the same amount of work and time for a four pound cheese as it is for a one pound cheese, and the larger wheels age better.....they are not all rind, there is actually some cheese in there.

The press in action (notice the notch in the lever arm that the point of the follower board fits into...without a notch, the follower will not remain level and the cheese may press unevenly):

I want to emphasize that I made this all from scraps that I had on hand....nothing was purchased to make this press.  The containers for the molds were purchased at a fraction of the cost of a "real" cheese mold and follower.  My point is this:  You do NOT have to spend a small fortune to do some dairying in your backyard and to make dairy products in your kitchen.  At the time of this writing, I have about 60 lbs of gouda and caerphilly in my cheese fridge in the cellar, 20-30 lbs of feta in the freezer, and maybe 12 lbs of chevre in the freezer.  We will be all set until next summer, when the cheese making starts up again in earnest.

For another great and free cheese press idea, check out my friend OhioFarmGirl's blog as she tells how she cuts the cheese......*snort*giggle*snicker*.......'scuse me, just a little cheese making humor!

Saturday, November 19, 2011

Pushy Peach

Last but not least, Peach.  She was rather pushy.  Not lady-like at all.  She and I need to sit down and have a little talk about correct behavior.

Dorian was a perfect gentleman:


Peach was a pushy little thing:
Here is conclusive proof, once and for all, that the does want to be with the buck.  Their instincts take over when the time is right.  Peach starts out behaving in a somewhat forward manner in this video.

When Dorian doesn't react in the way she wants him to, she gets downright aggressive.

Bottom line:  Ginger, Plum, and Peach all had dates with Dorian within a span of five days....April is going to be a busy, busy month! 

Thursday, November 17, 2011

Princess Plum

Plum came into heat yesterday, two days ahead of schedule.  This is what I found when I went out to milk....


There was a light drizzle, and Plum would never stand outside in any rain unless she was serious.  My husband drove Dorian away from the gate (he can be rather dangerous with those horns when in rut and there are willing does around) while I shoved Plum into his pen.  I didn't have to shove hard....she was pretty anxious to get in there.


I want to assure all the people who asked me, worriedly, if the girls are ok with this.  Yes, they are.  Without a doubt.  In this video (G-rated, don't worry!) Plum waves and practically points Dorian in the right direction.


Although I am very careful around Dorian, especially this time of year, he is very, very gentle with the does.  His only downfall is that he won't let them into his house so I can't leave them with him if it is raining.  And he stinks to high heaven.  That is Buck Cologne he is rubbing all over Plummy, and she will carry his stench for a few days.  I'll have to be very careful when I milk her....she won't get her usual hugs until she smells like her sweet self again.  If I get that cologne on my hands and then milk her, it will flavor the milk....ick.

 
Plum is back in with the rest of the girls.  This maneuver involves Peter driving Dorian to a far corner of his pen while I snatch Plum and get through the gate as quickly as I can.  Dorian is NOT pleased with me and now growls at me whenever I approach the fence.  What happened to that cute little Bambi I brought home in a dog crate in the backseat of my car two summers ago?

Peach came into heat late last night, in the pouring rain, so we put the two together at 10:30 PM.  We stood out there in the rain like a couple of voyeurs, our flashlight attracting attention three houses down the row.   Two kids.  The new neighbors, just moved in this fall.  Another conversation will be taking place in that household.  Mommy, what are the neighbors doing in the rain?  Watching wrestling, dear.  Now go brush your teeth.

Sunday, November 13, 2011

How to Keep the Kids Warm & Toasty


November goat shenanigans lead to April babies....and April can still be pretty durned cold and windy here in New England.  Here is a quick tutorial on how to make some warm baby goat coats with minimal sewing skills.

All you need is some of that fleece material....you know the stuff.....made from recycled plastic bottles, supposedly.  It is rather warm and somewhat wind-proof and best of all it needs no hemming.  It won't unravel and looks great after many washings.  It comes in many colors and designs and if you get it on clearance you can make a bunch of coats for a mere pittance.  Be sure to pick up some coordinating velcro from the bargain bin at the fabric store, too.  Not the sticky kind, the sew on kind.  You don't want it to blend in, just coordinate.  If it matches your material too closely, you will hear me saying, "I told you so!" when you are trying to close those coats on wiggly kids in a poorly lit stall.  I'm telling you.  Listen to the voice of experience.

These coats are great for jumping into piles of hay:


Or falling into piles of hay:


Or when helping with spring yard clean-up.....with proper supervision, of course:


First use newspaper or a rag to make a rough pattern and try it on your kids to get the fit correct.  You will be making this to fit a variety of sizes of kids and you will want it to fit them as they grow, so don't obsess too much.  It really just needs to keep the chest warm.  Keep some extra fabric and velcro on hand so you will be prepared to whip one out if you get any unusually large or small kids.  Over time, you will have a vast collection of these cute little coats.  It is very handy to have two per kid so you can dress them all warmly while they are drying from being born, then change them all into fresh dry coats when they are all fluffy.  The fleece material does a great job of wicking moisture away from damp babies.

Inside of the coat....notice the long, long pieces of velcro to allow for multiple sizes and growing kids:


Outside of coat:


Coat as it will fit on the baby....note the forward placement of the belly band to accommodate the buckling's....er....weiner.  And the healing umbilicus.  The width of the band makes it more comfortable and adds some warmth:


Best of all, a nice warm goat coat makes it possible for baby go out with the big girls!