Monday, April 9, 2012

Corned pork ribs

About 10 days ago, I made a brine and put about half of the ribs from our pigs into it to make some corned pork ribs.  I'd never had them before, but my mother fondly remembers having them regularly as a child.  There was not much online about them, nor could I find any mention in my old cookbooks.  So I had to wing it.

I used the same brine recipe that I use to make corned beef.  Used the same jars, too.  I cut the ribs into serving size pieces and stuffed them into two of those 2.5 gallon jars, topped them with brine-filled ziplocs to keep the meat under the liquid, and put them in the cellar fridge.  Then I marked the happy date on my calendar that they would be ready to cook and went about my business.

Pork ribs corning/brining in a big jar.

They were actually ready on Thursday, but it was three more days before I had a chance to try them out.  The scant instructions my mother could recall were to boil them with cabbage, similar to the way we cook corned beef.  I was in the mood for ribs on the grill, and had made a kickin' barbecue sauce last week, so we took a chance.

I par-baked them, covered with foil, for about an hour and a half.  A cautious nibble....tender enough, but hoo-boy, SALTY!!!  So they all went into a stock pot to boil for a minute or so and then get another good rinsing.  Next time, I'll start with the boiling.  These were far saltier than the corned beef, but they were also much, much thinner cuts of meat.  For ribs on the grill, I'll probably boil them briefly in 2-3 changes of water.  For corned pork ribs with veggies, maybe one change of water, as the veggies will take up a lot of the salt.  We tend to throw in a lot of veggies:  carrots, onions, rutabagas, cabbage, and maybe a potato or two.

Ribs ready for the oven for par-baking.

Peter took them out to the grill to blacken them, slathering on the barbecue sauce.  They were a bit different, for sure, but delicious.  We cleaned those bones and were looking for more!

Those two delicious BBQ ribs on my plate are the same two on the far left in the photo above.

Here is the BBQ sauce recipe I used.  It was a combination of recipes found online and tweaked according to both my food beliefs and what I had in my cupboards.  We both agreed that it is a keeper, and should we have a successful tomato crop this year, I'll be putting some of this up from our garden produce.  I'd been looking for a good sauce recipe, as the ones in the store are loaded with ingredients that we just won't eat....mainly high fructose corn syrup, msg, and other chemical ingredients.  This one could, in theory, be made entirely from home-grown ingredients.

Kickin' BBQ Sauce

(All ingredient amounts are approximate.  Adjust to your taste preferences.)
2 Tbsp bacon grease
1 med-large onion, minced
1 head home-grown garlic, or 4-6 cloves store-bought
1.5 tsp mustard powder
1/3 tsp hot pepper powder (more if not homegrown, to taste....I grew some very hot cayennes this year)
a handful each of dried oregano and basil, pulverized between the palms, or about a tsp or two each of flakes
1.5 cups or so of tomato paste (maybe two small cans?)
1 cup broth (I used pork since I had some in the fridge, I think any would work as long as it is gelatinous)
More broth as needed to get the consistency you prefer
3 Tbsp raw apple cider vinegar
2 Tbsp raw wildflower honey
Liquid stevia to taste (half dropperful)

Saute the onions and garlic in the bacon grease until nice and soft, then add everything else except the ACV, honey, and stevia.  Cook on a low simmer, stirring occasionally, for about 20 minutes.  Add broth as needed to keep it the right texture, but remember, you'll be adding more liquid after taking it off the heat.

Remove from heat, cool to warm/hot, add honey, stir will, add ACV and stevia, and mix well.  Put into jars for the fridge and use in about two weeks, or freeze in portions.

This is also wonderful as a sauce for pulled pork, and would make great hot chicken wings.

Hmmmm......what else could I make with this BBQ sauce?  Bring on summer, and grilling season!

Friday, April 6, 2012

Planning for pigs

Spring....so many chores that are time sensitive, and such gorgeous weather to do them in!  Since I got hit with a bad bug this week, I've been working on planning, mostly.

Part of that planning has me thinking about this year's piglets.  We will be buying two weaned piglets from a local farm and installing them in our pig pasture.  We will grow them mostly on free food gathered from local restaurants and farms, and hopefully, fallen acorns from the neighborhood this fall.  Of course, they will forage some of their food from their pasture.

Last year's pig project was an outrageous success.  We bought four piglets, two for us, one for my folks in exchange for lots of help with the fencing, housing (Dad built their A-frame house), food gathering, and butchering.  One pig went to the guys who came in to do the dirtiest of the dirty work.

The hubster watering the hogs with Mya's supervision.

We started raising our own pigs because we couldn't find exactly what we wanted locally....close, but not exactly.  And we have the land....not enough to rotate, as Joel Salatin does at Polyface Farms, but pretty close.  We honor the "pigness of the pig" as Joel would say, by allowing them to express their nature....digging.  You can tell the happiness level of a pig by how dirty his face it.  Note the level of dirt (cow poo, actually) on the faces of the pigs in the above link.  Happy as a pig in sh.......you know.  It is true.

Anticipation.....I'd swear they are smiling!

When we are low on gleaned foods, we supplement their pasture with corn fermented in whey from making cheese.  They love this.

Happy pigs!

Since having four pigs was a bit "overstocked" for the size of our pasture, I would also cut fresh grass and clover daily with my scythe and throw it in their pen.  We also gave them lawn clippings from our lawn and a neighbor's untreated lawn.  I was amazed at how much grass they would eat.  They will even eat hay, which I gave them on occasion if I just did not have time to cut anything for them.  Remember the little poem we'd recite as children when someone said the word, "Hey!"  (Should there be a question mark there???)  Hey is for horses, sometimes for cows, pigs would eat it, but they don't know how.  Yes, they do know how and they do eat it.  Who knew?

The two main reasons we raise so much of our own meat, eggs, and dairy are:

1.  The cruel conditions in which factory farmed animals are forced to live...and die.  That this level of cruelty is even legal is appalling.  If you bought it at the regular grocery store, chances are close to 100% that it was obtained with much suffering.  As much as possible, buy animal products from a farm that considers the pigness of the pig, that hens need to wander and scratch in the sunshine, and that cows need to eat grass and loaf in the shade.  

2.  The unnatural and unhealthy diets that these animals are fed.  We feed no soy here.  Chickens are not vegetarians, and cows are not omnivores nor are they designed to eat a bushel of corn every day.  If an animal has to be propped up with antibiotics to survive to a very young date with the butcher, there is a problem.  Have you bought chicken livers from the store lately?  Ug!  Yellow and diseased, and from very, very young chickens....chicks, really.

Many people ask us how we can eat animals we've raised ourselves.  We can, because we were brave enough to really consider the alternative.  We can, because we love and respect the animals.  Yes, it was a journey to get to this point, but we were determined to get here.  We also remind ourselves daily of what each animals' purpose is here on our farmlet by naming them accordingly.  The goats we keep are given thoughtful names....Ginger, Peach, and Plum.  The roosters are all named Stew.  The pigs get names like Porkchop, Bacon, and Barbi-Q.  We treat them kindly every single day they are with us, but we don't treat them like pets.

It should be difficult on slaughter day.  There should be a twinge of sadness and pain.  This is natural and healthy, and keeps us from becoming cold and calloused and allowing the things that happen on factory farms to happen.

Not on my watch.  I work to maintain a balanced view.....happy pigs, but food for the family.


And the bacon......glorious!

Wednesday, April 4, 2012

Food storage techniques of yesterday

This is one thing that was really exciting to me with this old cookbook from the World War II era.....food preservation.  Besides the usual section on canning, there were many options given for storing food.  Gardening and even having a few chickens was considered a patriotic duty during the war years, and people needed to store all the bounty.  Here is what they did....and many people today are returning to these older arts.
Notice the diagram illustrating how to turn the family cold frame (a mini greenhouse of sorts, used to start tender garden plants in a protected, sunny location near the warm foundation of the house) into a solar dehydrator.  Also, a plan for a collapsible indoor dryer.

I would love the have the one on the left to hang over my woodstove!
Here is a serious pair of dryers for someone preserving a lot of food during a heavy harvest:
Details on the ventilation needs of a root cellar:
Building a serious outdoor root cellar for those without a useable basement that can be converted:
And a link to some updated ideas and instructions online.

And finally, some simpler and smaller designs for those unable to build a proper root cellar this year, but still needing to store the garden harvest quickly:
The last two, although simple, were vulnerable to mice and other burrowing critters.  I've seen instructions online for converting an old refrigerator or freezer, compressor and coils removed and small holes drilled for dtainage, into a small cellar or clamp as shown in the picture with the buried barrel.  The freezer or fridge is buried in a convenient location and the top is covered with a few bales of straw or bags of fall leaves to insulate it and keep the ground from freezing.  These are easily set aside to access the food stored underground.

For dehydrating a lot of stuff all at once, I've been known to set trays in the back seat of my car and park it in the sun with two windows opened every so slightly to allow moist air to escape.  This works well for leafy herbs only, and maybe for getting some smaller veggie or fruit pieces started, then finish them up in the electric dehydrator.

I'd love to build that cold-frame/dehydrator for next year!

If you want to try to find this book, the title is The Culinary Arts Encyclopedic Cookbook by Ruth Berolzheimer.  There were several printings and it is a fairly sturdy book, so you just may have success in finding it.

Tuesday, April 3, 2012

My favorite cookbooks

First and foremost, Sally Fallon's Nourishing Traditions taught me what is healthy and what is not healthy, and gave me a framework to begin a new quest for healthy recipes to replace the recipes in my box.  Many.....most....of them are not part of a healthy lifestyle, and many were just plain dangerous.  Low-fat, fat-free, containing ingredients with msg, margarine, shortening, processed flours and sugars, etc.  Not part of a healthy diet, for sure.

Enter my "new" cookbook collection.  The first one was discovered during a quick run into a newly-opened Savers store (which I was NOT impressed with at all) among hundreds of used books.  I'm not sure what caught my eye, but I'm so glad my eye was caught!
Wanna know the title?  Here ya go:
Is that just the best picture?  If you click on it, you'll get a larger version and may even be able to read the text.

This book was copyrighted in 1948 but is really a series of World War II era booklets.  Thus, the recipes tend to be thrifty and simple and favor readily available ingredients....often from your own garden.  There are recipes for squirrel, opossum, rabbit, moose, venison, reindeer, pigeons, ducks, geese (including instructions on skinning a goose!), quail, pheasant, and many more. 

There are also hundreds of recipes featuring beef, pork, lamb, and poultry.  The pictures of the chickens and turkeys look strange by today's standards, with their lack of plump breast meat.....but that is what chickens and turkeys that can reproduce naturally really look like.  I now appreciate a cookbook that shows me pictures of what MY chicken dish will look like when I cook up one of our home-raised roosters.

Although I have many recipe books, I now have four of these very valuable (to me!) older books with real recipes featuring real food that can be cooked by real people.  I learned some tricks to finding them quickly among hundreds of old and new used books that often are not categorized for ease of shopping.

First, stand back and look at the shelves of books from a distance.  The correct distance for me is where I cannot read the titles.  I get very distracted and overwhelmed by the huge selection and chaotic displays.  Rather than read titles, I step back and look for books of a certain heft that simply look old.  Cloth bound and not glitzy, maybe even frayed a bit.  When I spot a likely candidate, I swoop in for a closer look at the title.  If it looks promising, I pull it out for a quick review of the contents.

I've found that I can quickly decide whether to discard a book or hug it delightedly by looking for a few simple things. 
The inclusion of aspics.  Aspics are cold meat dishes made with meat gelatin.  These were considered to be elegant luncheon meals and were garnished elaborately.  They've fallen out of favor and to be honest, I have no intention of making one.  However, if you see recipes for aspic in an old book, grab it.  Other recipes will be healthy and wonderful.  This book was copyrighted originally in 1956, but my pristine edition was copyrighted in 1977.  The recipes come from many different older cooks, including Julia Child.  I love this book.  Many of the recipes are obviously seasonal, with all the ingredients available from one's garden or the farmer's market at the same time, and none shipped around the world.  Wonderful, and very useful to those of us with gardens.  We had celery casserole for dinner....although I admit I bought the celery from the grocery store.  It was wonderful and I'd never seen celery featured so prominently in a recipe before.

Here's my sweet poodle helping me with my pictures by holding up the book for me:
Another feature to look for is the section on offal or variety meats.  These are mostly organs and other cuts that are almost unknown today.  You may or may not use these recipes, but it is a quick way to decide if the book comes home or not.
Gunnar helps me again with the photos:
This one was copyrighted originally in 1942....love those WWII era books!  Very thrifty and not yet afraid of butter and fats.  My copy was printed in 1962.  Notice all the post-it flags?  Recipes I'll be trying!

Tongue molded in aspic.....this one wins on two counts!
However, this book was copyrighted in 1973 and there are far fewer useful recipes.  There still are plenty, though, so it is a keeper.  The author was older when she compiled this book, and many of the recipes are obviously older, although "updated" with the liberal use of ingredients such as shortening.  The recipes are easily converted, though, by using butter in place of margarine and lard in place of shortening.  At least she wasn't afraid of fat.  That is half the battle with modern cookbooks and recipes.
Look!  Homemade puff pastry!!!
Not that I'll be making that anytime soon, but now I know I can, and I will make it one day for company as something special.  Yum.  Getting hungry again!

Reading these old cookbooks also reinforces my choice to embrace domesticity....something that is no longer valued.  The media, being around most people at meal times, and a trip through the grocery store.....we are bombarded with the notion that cooking from scratch is archaic and no longer worth the time.  Maybe even a sign of oppression.  Spending time with books that praise the art of homemaking and value skill in the kitchen....this makes me want to go rattle some pots and pans!  The results are well worth the effort.  My dear husband shows his appreciation by doing the dishes for me.  Unlike the housewives in the books, I do have to work outside the home.  But with a little cooperation, we can sit down to some wonderful and healthy meals.  The shared effort draws us closer, too, a wonderful benefit.

Coming soon:  My favorite sections of one of the oldest books....food preservation!

Make your own solar-powered clothes dryer

Remember these?
My dryer suddenly stopped working the way it should.  My neighbor, who can fix anything....and I mean ANYTHING....says the parts alone would cost so much that it is not worth fixing.  With some extra expenses this month, and my aversion to using the credit card, I decided to see how long I could put it off.

But...I only have one clothes line, strung from a hook on the house to a fence post.  It will hold almost a large load of laundry, an I often do 12-15 loads a week, what with the linens from our massage therapy practice.  So I got creative.
If you do this, just watch out  for rust on the fence, which will ruin any damp clothes that come into contact with it.  Part of our yard is fenced with a plastic coated fencing and that worked just fine for hanging smaller items.
I'm puzzled by home owner's associations that prohibit clotheslines.  I agree that the lines should have some standards for aesthetics, however, prohibiting them altogether is so 80's.  Time to get green.  Time to call a meeting and get the rules amended if you live under such archaic rules.

My neighbors tell me that watching me hang laundry, and the colorful clothes waving in the breeze, are rather relaxing sights.  Then they quickly state that they don't watch me, they just happened to glance out the window.  Hee-hee.  I know I'm watched.  I saw the video camera the day the tom turkey hopped over the fence in the rain and I climbed over after him in my Australian stock coat and my Indiana Jones hat and my clunky muck boots.  I just wish I knew how to find that one on youtube.

My point is, most people don't find the sight of hanging laundry to be offensive.  On the contrary, most people find it to be an attractive view.  HOA's need to get with the program.

Within certain parameters.  I had to hide our delicates on a fence that was hidden from neighbors and the street.  I'll show you, since you won't tell anyone.
Everywhere I looked, my yard was flapping with color.  It was as if everything suddenly bloomed all at once.
Although it creates some extra steps for me, I must say that I enjoy hanging the laundry out to dry in the sun and wind.  There is nothing that comes in a bottle that can recreate the smell of breezy sunshine that gets into the cloth.  My dryer still tumbles and has cool air, so I tumble almost everything with a dryer ball so I don't have to iron, and also to remove the pollen.  For dress shirts and such, I add a dampened small towel and they come out wrinkle-free.

I'm now thinking of putting up a serious clothesline.  I found a set out in our woods, galvanized pipes with a cross-bar with hooks for seven lines.  That could do some serious drying.  I can't wait to see the electric bill next month!

Monday, April 2, 2012

Dinner in minutes from leftovers

Here is how I often use leftover chicken, pork, or beef....start with garlic and bacon grease, add scallions (growing right now in the garden), and a few mushrooms if you have them.  I found a few on our shiitake logs last week.
Add wine or broth.  I like using homemade onion wine:
Cook for a few minutes (10?) to blend flavors, and add your leftover meat and heat through.  Salt and pepper to taste.  Done.  We eat this out of bowls with a few servings of veggies on the side.  The veggies can be steamed and buttered or sauteed while the sauce is cooking down.  Dinner in 20 minutes!
This was so good!  Right now I have two pork roasts to take apart.  I cooked them last night...AFTER supper....for the express purpose of having "leftover" meat for quick meals during the upcoming busy week.

Don't have time to cook?  Yes, you do!  Not much of a food budget?  The only items purchased for the above recipe were black pepper and an 89 cent packet of yeast with which to make the onion wine.  Even if all the items were purchased, it is still a pretty cheap....and delicious....meal.  Now go rattle those pots and pans......you can do it!  It is well worth the effort.  Yum!

Sunday, April 1, 2012

Feeding growing chicks.....without soy

Ya know how all those advertisements and labels say "no hormones?"  Our eggs have no hormones, our chickens are growth-hormone free, our milk is hormone free, etc?  Well, lean in a bit closer, I have some bad news for ya.

Soy.  Yup, soy.  They don't have to label it as a hormone, but when it is fed to the animals, it behaves in the body like hormones.....particularly estrogen.  It makes chickens lay more eggs and start at a younger age.  It makes cows give more milk.  It makes human girl babies develop sexually at a frighteningly young age....as young as 6 years old!.....and stunts the sexual development of little boys.  Men, do you like boobs?  Well, good, because you'll have a pair on your own chest if you continue to eat soy.....and soy is in almost every processed food today.

And it is used to grow the meat, eggs, and dairy products found in grocery stores all over this country.

Not on my farmlet.    We are soy-free here and plan on staying that way.

That can be a challenge when raising young chicks without a hen for a mother to show them how to find worms and bugs.  Commercial chick starter feeds depend heavily on soy for the protein.  Have you seen those egg cartons in the grocery store labeled "our hens eat a vegetarian diet?"  Lean in a little closer, my dear, and hear this:  Chickens are not vegetarians!  They are omnivorous, and depend rather heavily on the protein portion of their diet.
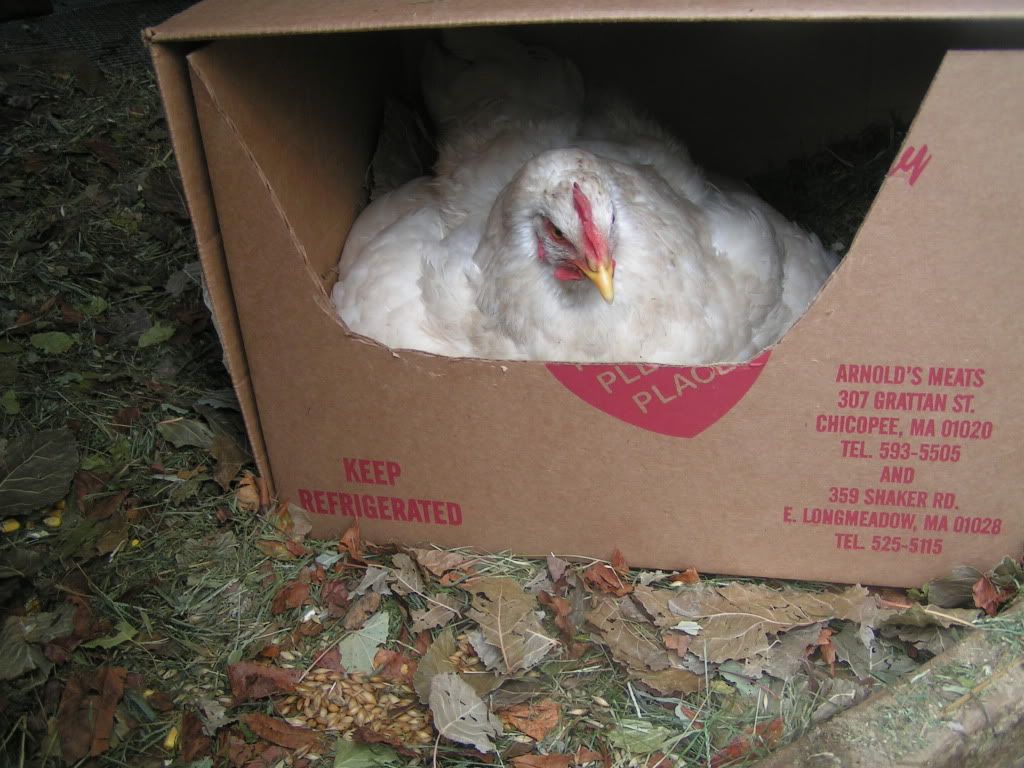
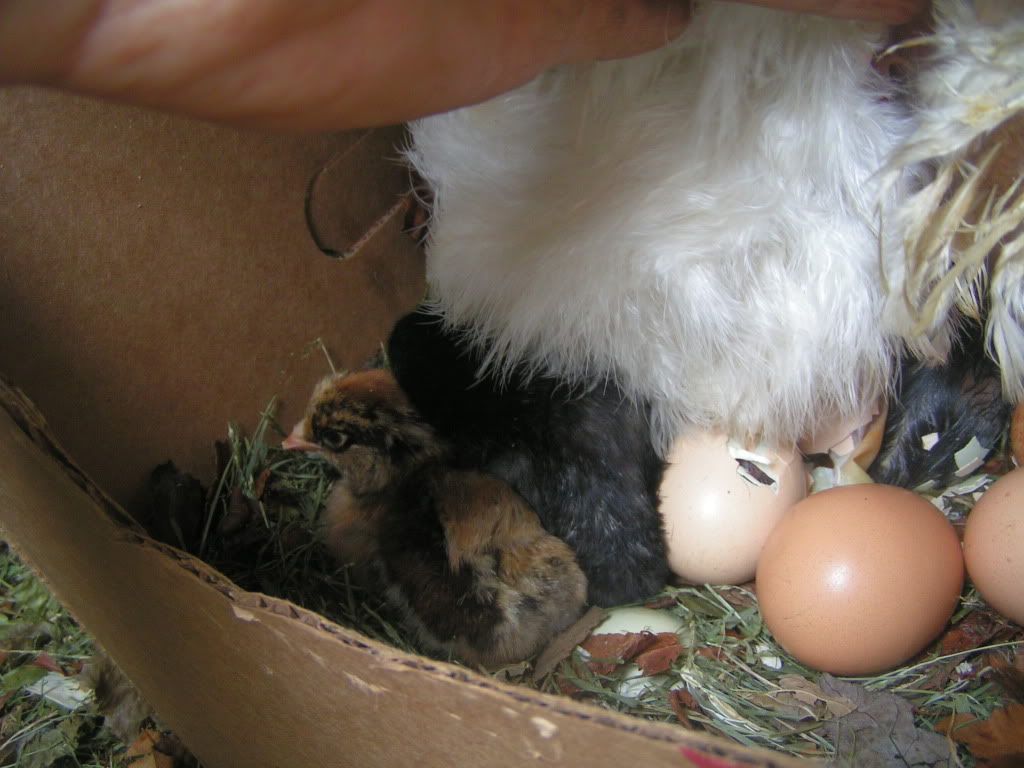
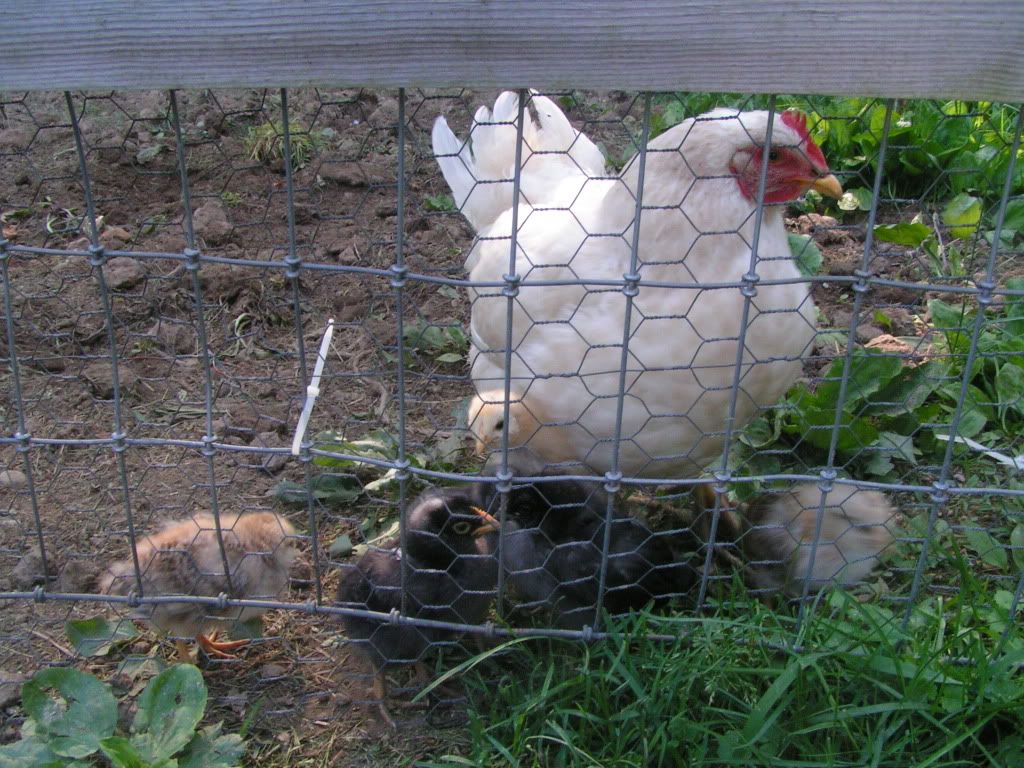
When I had broody hens raising their own chicks, they knew what to feed them.  Even though these hens were not raised by a hen themselves, but under a heat lamp in my cellar, they knew what was real food for their little ones.  Worms.  Lots and lots of worms.  I would watch them feed their babies by scratching in the dirt and placing a small worm on the ground in front of a chick.  If the chick was very young and didn't immediately snatch up the worm, the mama hen would pick it up and put it down again in front of the chick.  The little ones instinctively go for movement, and would quickly see the movement of the worm or grub and swallow it down.
I fed her grains, and even ground some up so she could offer it to the chicks.  They wouldn't eat it.  They just wanted fresh, live worms.
Vegetarian chickens?   Seriously?

(Sadly, the above hen was killed by a young bald eagle last spring, hence my quest for a small flock of broody hens....and my Icelandic project.  She successfully raised the chicks in the photos, and the girls are all laying eggs for us this year.  The boys.....*burp*.....well, let's just say we enjoyed the roosters and leave it at that, shall we?)

Online research (most of it) would have you believe that we commoners are far too stupid to figure out how to keep our birds healthy so we need to rely on the big feed manufacturers to help us.  Hogwash.  All you need is a basic understanding of simple math and a few readily available ingredients.  I'll give you my recipe, but also the principles to guide you so you can always formulate feed with whatever ingredients are available when you have chicks to feed.

I used whole wheat that I got for free from a clean-out last year.  I have some whole wheat that I sprout for the goats and hens, and got several cases of these cans of cracked wheat that I set aside for raising chicks.  This is readily available through co-ops and online, but you can use other options....get ideas from the site linked above, the one with the math lesson.  I use what I have, and you should, too.
I feed Taste of the Wild dry catfood, venison version, to my barn cats.  This is a soy-free food with a very high protein content, higher than soy.  This was an easy source of protein for my mix.  I also added a small amount of alfalfa pellets for an easy source of greens, until they reliably eat grass and weeds and such.
Using Pearson's Square and my ingredients, I came up with a recipe.  7.5 parts catfood, 2 parts alfalfa, and 26 parts wheat.  Change "parts" to "ounces" and you have my current recipe.
After grinding the catfood and alfalfa pellets in my Vitamix, I layered it with the wheat in gallon jars, mixed it with my hands, and voila!  Chick starter, free of phyto-estrogens....soy.
I went a little heavy on the protein, upping the catfood to 8 oz from 7.5.  Err on the side of caution, I figured.

Commercial chick starter is so finely ground that the little ones don't need to "chew" it.  Chickens....all birds, really....grind their food in their gizzards, a very muscular, hollow organ that they swallow pebbles into.  The gizzard squeezes the food against the pebbles, acting like a mouth full of teeth thoroughly grinding the food.  Since my mix is not so finely ground, I also feed granite bits called "grit" to my chicks.  Beware of oyster shell sold as grit....it will dissolve in the bird's gizzards and not be useful for grinding, and will supply too much calcium to young chicks.  I've been known to pick up fine bits of sharp rocky sand and rinse it off (from a dirt road) when I couldn't locate crushed granite.
I load their feeder with my mix and sprinkle a bit of grit on top.  Later, they will get their food selections in separate containers so they can begin to learn to balance their own diets, as my adult flock is expected to do.  I have already started this process by adding some whole grains and some clumps of grass with roots and dirt to their home.
For the sake of safe water (chickens will poop in their water source....a LOT!) I add a glug of raw organic apple cider vinegar to their waterer when I fill it up.  This has a mild disinfecting effect and also provides good bacteria  to aid in digestion.  The dirt from the grass clumps, taken from my organic garden, also provide wonderful good bacteria to populate the digestive tract of the growing birds.
Aren't they getting big?  Look at those wing feathers...and most of them have little tail feathers now.  Still cute, but at almost three weeks old, they are starting to resemble small chickens.  As soon as they are feathered out, they can live outside without the heat lamp.  I can't wait for that day!  Neither can they.  They are off to a great start.