
Tuesday, January 31, 2012
Sunday, January 29, 2012
Promised results
I promised I'd tell you about how we did on the sugar handling diet. Two weeks of whining (from me, anyways!) Here it is.
We are still on it. This is the end of week three, actually. There were so many positive changes, we both agreed that a couple more weeks were indicated. Hubby lost some weight....although he didn't weigh himself, he said his shirts were all fitting more loosely, and he was already getting some comments from others on that. It is so nice when people notice!
He drives to work every day at around 5 AM, and had difficulty staying awake. He leaves work at 9:30 AM and would usually stop for food and/or drinks (not healthy choices) on a daily basis, mostly just so he could stay awake on the drive home. He reports that he no longer feels so sleepy and no longer stops for food or drink. He also started bringing water from home with him, and makes sure to eat a hearty breakfast before leaving. Some of the things he comes up with! Lately it has been eggs scrambled with crumbled meatloaf and salsa. He also keep plenty of boiled eggs in the fridge for quick snacks, and a jar of nuts handy.
He also says his thinking seems clearer, and he is enjoying this way of eating. No more cravings...at all! I didn't have the same experience in that department, unfortunately, but I found I had fewer cravings if I ate more saturated fats. My main source of saturated fats before involved grains, usually: heavily buttered toast, bacon-feta popcorn, pie crust made with lard.
My results were rather interesting, too. I usually had trouble getting up in the morning.....hubster called me a diesel....hard to start on cold mornings and slow to warm up. I often slept until 9 or later if my schedule allowed, and still dragged around a bit until I had a good hit of caffeine. Then in the evening, I had trouble settling down and would have half a glass of wine to unwind and get to sleep. With my popcorn.
Almost immediately I started waking up between 7:15 and 7:45 AM, and would get right out of bed, without an alarm clock. The dogs were so confused, I had to wake them up! I had plenty of energy and would have to be careful not to do too much. I work evenings most days and need to reserve energy, so I can't really hit the ground running that early. I got a lot of reading and homework done in those early hours.
I would fall asleep at night quickly and easily, and stay asleep. Instead of reading for 30-60 minutes after my wine, I read for about five minutes before I was falling asleep on my book. Without having any wine. Reaching to shut off the bedside lamp didn't wake me up again, either. I went right into a restful sleep.
The most interesting thing for me, however, is something I was reluctant to tell but feel I must. Somehow it is a bit embarrassing, and I'm not sure why. Lately, I often had very disquieting thoughts come into my mind unbidden. OK, disquieting is a mellow term. Horrifying is a better term. For example, as I crossed the yard to go feed the animals, my buck would stand up against the fence and greet me with a loud and demanding baaaa. I would imagine him leaping over the fence and beating me to the ground with those huge horns of his, killing me. Or I would go to hug my lovely does, and would suddenly imagine them dead, torn apart by coyotes. Horrid images that came in quickly and were hard to drive out. When snow was forecast, I would urge my husband to call out of work. You get the idea.
I didn't realize that these thoughts weren't there anymore until a few days ago when I was feeding the buck over his fence. He got impatient with me and rammed the fence in frustration. I laughed and told him to cut it out....then I realized that, even though he was now giving me a reason to have worrisome thoughts, I was only amused and had no fear. Amazing. All from simple, yet challenging, dietary changes.
Last Sunday, when the two weeks was up, I decided to add one item back into my diet, and chose aged homemade goat cheese. That addition went well, so a few days later I had some popcorn, doused heavily with butter and feta cheese, and a half a glass of home made cinnamon-vanilla mead. Heavenly! But the next morning I got up when the dog needed letting out around 8:30, and laid down on the couch and dozed until 10 AM. I finally had to get up and do chores, but I dragged until noon and didn't have as much energy all day. It took another day on the strict version of the sugar handling diet to get me back on track.
That experience alone has made it much easier to stay on the straight and narrow. My current plan is to stay on this for another week, or four weeks, before trying again to add carbs back into my diet. I'll choose something smaller and part of a meal next time, instead of smashing my body with that hit of sugar all at once in the form of popcorn and wine. Hubby feels so great that he has no trouble staying on this with me.
How long will we stay on it? I don't know. It depends. .Each small experiment will tell us whether we've healed enough or not. But we'll not ever be back on the SAD....the Standard American Diet. Ever.
Saturday, January 28, 2012
Italian.....chili?
I needed something different and delicious that will re-heat well and that we could eat many times over without getting tired of it. Chili was a safe bet, and I would make it without beans.....we can add cooked beans later if there is some left after we ease off of the strict phase.
 I started out with......you guessed it......pork. We put three hogs into the freezers and are eating our way through them. After reading this article on what eating pork properly prepared (marinated with vinegar, for example) will do to your cardiovascular system vs just slapping the pork in a hot pan, I decided to re-work a lot of my recipes and methods of cooking with pork to make this wonderful homestead meat a healthier part of our diet. This took a bit of planning. I thawed some ground pork, then ran it through the mixer in batches with about a tablespoon of raw apple cider vinegar (Bragg's) per pound. Actually, it was a glug or two per bowl of meat.
 I put this all in a big bowl, covered, and put it on our cool winter porch for a day....actually three days, since life sent a kink in my plans. The nice thing about home raised meat is that it does not go bad like factory farmed meat does. It just does not contain the bacteria levels that commercial meat and poultry is swimming in. My pork was perfectly good, and perfectly marinated in the vinegar.
Next, I browned the meat in two cast iron skillets (to get it done faster without crowding the pan) while I peeled and diced onions and garlic.
 After transferring the browned meat to my big stock pot, I browned the onions for a bit and then added the garlic. This was also transferred to the big pot.
 Meanwhile, I had a steamer pot on a back burner with a gallon bag and a half of frozen, shredded zucchini from our summer garden. This released a lot of water, and I pressed it with a potato masher to get more of the water out. This way it would add some nutrients without a lot of water and zucchini flavor.
 I added diced tomatoes, reserving the juice and half of the tomatoes to use in the blender to chop some frozen greens (I used collards) and some frozen green beans. This would make my chili into a complete meal, with some variety of veggies. It would also make up some of the bulk that would be missing without adding the beans. My chili was looking rather green at this point and was quite watery with all the veggies, so I added some tomato paste to thicken it up and make it more tomato-y.
Now it was time to add the spices and simmer for an hour or so. But I hesitated.....I was really missing pizza, and the hubster really likes his Italian pasta dishes. I switched mid-recipe and changed to Italian herbs from our garden....lots of oregano, basil, parsley, bay leaves, along with salt and pepper. This would be thick like chili, to be eaten by the bowlful, but with an Italian flare.
 It was a big hit with the hubby. I served it with some grated goat Caerphilly cheese. This was so delicious and I'm so glad I used my huge new pot because it seemed to keep growing! I will freeze some of it in single serving sizes for quick meals. I think it would travel well in a thermos, too, for lunches at work. A nice green salad would be perfect with this.
Ideally, I would have used garden tomatoes, but it was a bad year in the garden for tomatoes and we ran out a while ago. Next year....hope springs eternal in the gardener's heart!
You can convert any chili recipe you have to make this if you want a guideline with exact amounts. I didn't measure much, I just tasted as I went along, then had hubby taste it near the end and added a bit more oregano.
Italian Pork "Chili"
7-8 lbs ground pork, marinated at least a day with about a half cup of apple cider vinegar (beef will do, but it is not necessary to marinate beef)
4 large onions, diced
1/2 - 1 bulb of garlic, to taste
12 lbs or so of diced tomatoes
3 lbs or so of tomato paste
1.5 gallons shredded zucchini, steamed and wrung somewhat dry
1 lb each of greens and green beans, chopped coarsely in the food processor or blender
4-6 bay leaves
several handfuls of whole dried oregano leaves, crumbled
a couple handfuls of whole dried basil leaves, crumbled
a handful or two of whole dried parsley leaves, crumbled
sea salt to taste
black pepper to taste
Brown meat, brown onions, sweat the garlic a bit. Add to pot with remaining ingredients. Simmer for at least a half hour, taste, and adjust seasoning. Simmer another half hour, taste again and adjust as needed. Simmer a bit more after each addition of herbs, to blend the flavors.
 Serve in generous portions in bowls, with or without a topping of a sharp cheese. Mozzarella could be browned in the oven if you use oven-safe bowls.


Next, I browned the meat in two cast iron skillets (to get it done faster without crowding the pan) while I peeled and diced onions and garlic.


Now it was time to add the spices and simmer for an hour or so. But I hesitated.....I was really missing pizza, and the hubster really likes his Italian pasta dishes. I switched mid-recipe and changed to Italian herbs from our garden....lots of oregano, basil, parsley, bay leaves, along with salt and pepper. This would be thick like chili, to be eaten by the bowlful, but with an Italian flare.

Ideally, I would have used garden tomatoes, but it was a bad year in the garden for tomatoes and we ran out a while ago. Next year....hope springs eternal in the gardener's heart!
You can convert any chili recipe you have to make this if you want a guideline with exact amounts. I didn't measure much, I just tasted as I went along, then had hubby taste it near the end and added a bit more oregano.
Italian Pork "Chili"
7-8 lbs ground pork, marinated at least a day with about a half cup of apple cider vinegar (beef will do, but it is not necessary to marinate beef)
4 large onions, diced
1/2 - 1 bulb of garlic, to taste
12 lbs or so of diced tomatoes
3 lbs or so of tomato paste
1.5 gallons shredded zucchini, steamed and wrung somewhat dry
1 lb each of greens and green beans, chopped coarsely in the food processor or blender
4-6 bay leaves
several handfuls of whole dried oregano leaves, crumbled
a couple handfuls of whole dried basil leaves, crumbled
a handful or two of whole dried parsley leaves, crumbled
sea salt to taste
black pepper to taste
Brown meat, brown onions, sweat the garlic a bit. Add to pot with remaining ingredients. Simmer for at least a half hour, taste, and adjust seasoning. Simmer another half hour, taste again and adjust as needed. Simmer a bit more after each addition of herbs, to blend the flavors.

Friday, January 27, 2012
In a hurry? A grab-n-go snack or meal
We know that store a bought single serving size of just about anything is not a healthy choice. But so temptingly convenient! Here is an idea that is easy, satisfying, and can be made up in advance twice a week and has as many variations as you can come up with.
 Why so black, you ask? This version is made with wild elderberries that I picked while walking the dogs last summer. When ripe, they are so purple that they look black. But these little berries that grow like weeds are packed with super antioxidants and are worth the effort for your winter diet. Caution: Do not eat them raw! They are poisonous raw, which means the birds leave them alone....more for you! The poison is neutralized through cooking, drying, or fermenting, as in making wine.
What you see in the pictures is my homemade goat's milk chevre, a mild, fresh, raw cheese that is so easy to make. I'll do a tutorial on making chevre next time I make it. For those not able to make chevre or to purchase it for a reasonable price, yogurt is a good substitute.
Look for the organic brands of yogurt in the quart container, plain, unsweetened, and made from whole milk....no low-fat allowed! Low fat milk products usually have powdered milk added to them, and it does not have to be labelled. Legally, powdered milk is considered to be milk....but biologically, your body does not recognize it as it is so damaged through the processing. It is an ingredient to be avoided. Remember, if your great-great-great grandmother (or somebody elses.....avocados would be off my list, otherwise) wouldn't recognize it, you shouldn't eat it!
In my days BG (before goats), I would strain my purchased yogurt. I seriously disliked the particular sour that is yogurt, although I do love other sour tastes. Straining it reduces that sour taste dramatically and thickens the yogurt to a lovely cream cheese texture. It is a simple as lining a colander with a layer or two of cloth....I used a piece cut from a thick t-shirt....and putting that over a bowl. Plop the yogurt into the cloth, cover it with the corners of the cloth to keep it clean, and leave it at room temp for several hours. The whey (liquid) will drain much better at warmer temperatures. Just keep the cats out of it. This is basically Greek yogurt.
Whether you use cheese, yogurt, or strained yogurt, the next step is to choose your fruit to flavor it with. You may slightly sweeten the cheese/yogurt with a little stevia or raw local wildflower honey, but I don't.
The fruit can be almost anything you like, and can be fresh, frozen, or a cooked sauce. Look at pie recipes for ideas. Some of the things I use are frozen berries, lightly sweetened with stevia, and used frozen or thawed. I also like apples, diced and simmered with a handful of organic raisins to sweeten them and some cinnamon and butter. Pears and raspberries or elderberries are a wonderful combination, too, but remember to simmer the elderberries for a while (20 minutes or more, until the bitter taste is gone) and don't simmer the raspberries, just add them when the pears are done and stir gently, off the heat. A mince pie version can be made by using more raisins to apples and adding more spices....throw in cinnamon, nutmeg, allspice, ginger, and cloves, and plenty of it. Simmered peaches are wonderful. Plums and blueberries go great together. Strawberries, fresh or frozen, are wonderful.....mash half of the berries with a potato masher or the back of a fork for the sauce, and slice the rest.
Add a big glob of butter to your cooked fruit. Good fats will lower the glycemic load of the fruit and will keep it from spiking your blood sugar levels. Your body will thank you by resting your adrenal glands and also by not triggering the fat storage response. Our great-great-great grandmothers knew this instinctively and always added lots of butter to fruit pies before putting that top lard crust on. Obesity was not an issue in their households, either.
Line up some small canning jars.... I use 8 oz jelly jars, but if your kids are small, you can use the 4 oz jars, too. These are available in hardware stores, farm stores, and even grocery stores (in season...some farm and hardware stores will have them year-round or can order them for you.) It is very handy to purchase the white plastic caps that are made to fit on the jars, too, since you won't be actually canning this. If you are on a tight budget, recycle whatever small jars you have or that friends will save for you.
Put a generous spoonful of cheese or yogurt into the jar and smooth it out a bit. Then put in a tablespoon or so of your fruit mixture. Continue layering until your jar is full, ending with fruit.
 Prepare for these to disappear at an alarming rate!
Extra hint: Both mayo jar lids and Classico pasta sauce jar lids fit on these canning jars. If you know someone who still uses these products (you don't use them, right?) ask them to save the lids for you. People will! Just keep asking!

What you see in the pictures is my homemade goat's milk chevre, a mild, fresh, raw cheese that is so easy to make. I'll do a tutorial on making chevre next time I make it. For those not able to make chevre or to purchase it for a reasonable price, yogurt is a good substitute.
Look for the organic brands of yogurt in the quart container, plain, unsweetened, and made from whole milk....no low-fat allowed! Low fat milk products usually have powdered milk added to them, and it does not have to be labelled. Legally, powdered milk is considered to be milk....but biologically, your body does not recognize it as it is so damaged through the processing. It is an ingredient to be avoided. Remember, if your great-great-great grandmother (or somebody elses.....avocados would be off my list, otherwise) wouldn't recognize it, you shouldn't eat it!
In my days BG (before goats), I would strain my purchased yogurt. I seriously disliked the particular sour that is yogurt, although I do love other sour tastes. Straining it reduces that sour taste dramatically and thickens the yogurt to a lovely cream cheese texture. It is a simple as lining a colander with a layer or two of cloth....I used a piece cut from a thick t-shirt....and putting that over a bowl. Plop the yogurt into the cloth, cover it with the corners of the cloth to keep it clean, and leave it at room temp for several hours. The whey (liquid) will drain much better at warmer temperatures. Just keep the cats out of it. This is basically Greek yogurt.
Whether you use cheese, yogurt, or strained yogurt, the next step is to choose your fruit to flavor it with. You may slightly sweeten the cheese/yogurt with a little stevia or raw local wildflower honey, but I don't.
The fruit can be almost anything you like, and can be fresh, frozen, or a cooked sauce. Look at pie recipes for ideas. Some of the things I use are frozen berries, lightly sweetened with stevia, and used frozen or thawed. I also like apples, diced and simmered with a handful of organic raisins to sweeten them and some cinnamon and butter. Pears and raspberries or elderberries are a wonderful combination, too, but remember to simmer the elderberries for a while (20 minutes or more, until the bitter taste is gone) and don't simmer the raspberries, just add them when the pears are done and stir gently, off the heat. A mince pie version can be made by using more raisins to apples and adding more spices....throw in cinnamon, nutmeg, allspice, ginger, and cloves, and plenty of it. Simmered peaches are wonderful. Plums and blueberries go great together. Strawberries, fresh or frozen, are wonderful.....mash half of the berries with a potato masher or the back of a fork for the sauce, and slice the rest.
Add a big glob of butter to your cooked fruit. Good fats will lower the glycemic load of the fruit and will keep it from spiking your blood sugar levels. Your body will thank you by resting your adrenal glands and also by not triggering the fat storage response. Our great-great-great grandmothers knew this instinctively and always added lots of butter to fruit pies before putting that top lard crust on. Obesity was not an issue in their households, either.
Line up some small canning jars.... I use 8 oz jelly jars, but if your kids are small, you can use the 4 oz jars, too. These are available in hardware stores, farm stores, and even grocery stores (in season...some farm and hardware stores will have them year-round or can order them for you.) It is very handy to purchase the white plastic caps that are made to fit on the jars, too, since you won't be actually canning this. If you are on a tight budget, recycle whatever small jars you have or that friends will save for you.
Put a generous spoonful of cheese or yogurt into the jar and smooth it out a bit. Then put in a tablespoon or so of your fruit mixture. Continue layering until your jar is full, ending with fruit.

Extra hint: Both mayo jar lids and Classico pasta sauce jar lids fit on these canning jars. If you know someone who still uses these products (you don't use them, right?) ask them to save the lids for you. People will! Just keep asking!
Thursday, January 26, 2012
The protocol, short version
Here is a run down of what we ate on the sugar handling diet....it is not just the what, but the when and the amounts that are critical. Eating often enough and getting enough fat and protein was a bigger challenge for me than feeling deprived. I found out that I need more fat and my husband needs more protein....he ate lots of eggs for snacks while I went for avocados, sunflower seeds, and fried salt pork (our bacon arrived yesterday, woohoo!)
Short version: Eat tons of LG veggies (low glycemic, lists available online) with plenty of good fats. Carrots can be eaten raw but not cooked, as cooking raises the glycemic index. Lots of good protein, preferably
meat, poultry, eggs from organic pastured sources. Eat with the fat...no lean or skinless anything. Bacon from good sources, nitrate/nitrite free. Lots of leafy green veggies, lots!
No grains of ANY kind....anything processed or prepared like crackers, bread, etc, and no oatmeal, rice, grits, cereals, etc. No popcorn. (I love popcorn! This one was the hardest for me, as my popcorn is mostly a vehicle for a half cup of butter and lots of sea salt.)
Eat fruit sparingly and LG choices like berries, half an apple. Not HG (high glycemic) like bananas or grapes. Eat only one or two small servings (half an apple) and always with some source of fat, like a handful of nuts (not peanuts) or seeds such as pumpkin or sunflower seeds. Avocados are a great source of good fat. Coconut oil is another. I can actually eat a chunk of it chilled in an ice cube tray. You can fill the tray with nuts and pour lightly melted coconut oil (Stop&Shop organic section, looks like a peanut butter jar filled with white stuff) and refrigerate until firm. It is melty, so eat fast right from the fridge. Don't pack in a lunch, though, it might melt and get messy.
No dairy (use butter if you must, try to get Kerrygold or other good, pastured {cows live outside eating grass on pasture} brand)
Eat every 2-3 hours and within an hour of getting up in the morning. Have 4-6 oz of protein in each of these meals. And some veggies if possible. Raw carrots and a bit of cold chicken works great for a meal on the go.
Don't forget to salt your meat, necessary to protein digestion.
Hope I got everything! It is very important to eat every 2-3 hours and don't skip! You want your blood sugar to remain very, very steady throughout the day. Eat more saturated fat from good sources if you have strong cravings, as this will sometimes satisfy them.
This is for two weeks if you are strict. If you fall off the wagon, you will need to start the timer again. After two weeks, re-evaluate, and if tests show you need to go another two weeks, do so. Or add certain foods
back slowly and evaluate how you react, writing down anything new. Keep the diet strict still...we are talking about adding dairy, maybe, for a few days in small amounts and from good sources (raw, organic). Then if that goes well (or not, and you must eliminate for a longer time period) maybe have some properly prepared
grains (see chapter in Nourishing Traditions on grains).
Here is a lunch I packed to bring to the office on one of the days:
 Meatballs, which can be eaten cold as well as hot, along with an avocado stuffed with sunflower seeds and a bowl of homemade fermented salsa, loaded with wonderful probiotics. Not so bad, huh?
Short version: Eat tons of LG veggies (low glycemic, lists available online) with plenty of good fats. Carrots can be eaten raw but not cooked, as cooking raises the glycemic index. Lots of good protein, preferably
meat, poultry, eggs from organic pastured sources. Eat with the fat...no lean or skinless anything. Bacon from good sources, nitrate/nitrite free. Lots of leafy green veggies, lots!
No grains of ANY kind....anything processed or prepared like crackers, bread, etc, and no oatmeal, rice, grits, cereals, etc. No popcorn. (I love popcorn! This one was the hardest for me, as my popcorn is mostly a vehicle for a half cup of butter and lots of sea salt.)
Eat fruit sparingly and LG choices like berries, half an apple. Not HG (high glycemic) like bananas or grapes. Eat only one or two small servings (half an apple) and always with some source of fat, like a handful of nuts (not peanuts) or seeds such as pumpkin or sunflower seeds. Avocados are a great source of good fat. Coconut oil is another. I can actually eat a chunk of it chilled in an ice cube tray. You can fill the tray with nuts and pour lightly melted coconut oil (Stop&Shop organic section, looks like a peanut butter jar filled with white stuff) and refrigerate until firm. It is melty, so eat fast right from the fridge. Don't pack in a lunch, though, it might melt and get messy.
No dairy (use butter if you must, try to get Kerrygold or other good, pastured {cows live outside eating grass on pasture} brand)
Eat every 2-3 hours and within an hour of getting up in the morning. Have 4-6 oz of protein in each of these meals. And some veggies if possible. Raw carrots and a bit of cold chicken works great for a meal on the go.
Don't forget to salt your meat, necessary to protein digestion.
Hope I got everything! It is very important to eat every 2-3 hours and don't skip! You want your blood sugar to remain very, very steady throughout the day. Eat more saturated fat from good sources if you have strong cravings, as this will sometimes satisfy them.
This is for two weeks if you are strict. If you fall off the wagon, you will need to start the timer again. After two weeks, re-evaluate, and if tests show you need to go another two weeks, do so. Or add certain foods
back slowly and evaluate how you react, writing down anything new. Keep the diet strict still...we are talking about adding dairy, maybe, for a few days in small amounts and from good sources (raw, organic). Then if that goes well (or not, and you must eliminate for a longer time period) maybe have some properly prepared
grains (see chapter in Nourishing Traditions on grains).
Here is a lunch I packed to bring to the office on one of the days:

Wednesday, January 25, 2012
My two weeks on the sugar handling protocol
OK, here it is.....I've made references to the strict diet my husband and I have been on and as promised, I'll tell you a bit more about it. First, though, a peak at a lunch I enjoyed this past week: Green beans cooked with salt pork and meatballs made with pastured pork and grass-fed beef. Yum.
 First, the why. In school (I'm currently studying to become a nutritional therapy practitioner) we practiced functional evaluations on each other early in December. This involves a series of physical tests and evaluation of tender points in the body that relate to various organs, glands, or functions of the body and indicate balance/imbalance that can be corrected nutritionally. It is the coolest thing! It allows the client to focus on whatever area of health is most critical at the moment, even though symptoms may not yet be apparent, and work with the diet and lifestyle changes to optimize health.
My results startled me. I eat almost no sugar, and what little I do eat is usually in a very natural form. For example, I sweeten pies with raisins. I also eat very few grains, and what grains I do eat are almost all ground by me from organic wheat and prepared in a traditional manner, by soaking or fermenting the flour before cooking it. So I was stunned to see my scores for sugar handling in a very dangerous range....how could that be? And I've slowly been gaining weight, in spite of my excellent food choices and activity levels.
I learned that blood sugar regulation is a function not only of the liver and the pancreas, but also of the adrenal glands. These two little teepee shaped glands sit on top of each kidney like little caps. They have many functions, and one is to help us cope with stress. When the body is stressed, it needs energy, and energy is provided by sugar. We are designed to get our sugar needs met by healthy foods, mostly vegetables and some fruits. There are two main things that break down the bodies' ability to properly regulate sugar in the blood: a diet containing processed foods including white flour and refined sugars and too many starchy vegetables, or repeated stressors on the body, either physical or psychological/emotional.
I've had a fun year or two, with lots of good things in my life but also lots of stressors beyond my control......a painful injury that took weeks to heal (still not there yet), an emergency surgery (minor, but not to me!), the serious illnesses and deaths of several people in my inner circle, etc. Life, but a bit faster than normal. So I was not completely shocked to see my adrenal function was very, very low.
We can't always simply decide to get rid of all stressors in our lives....especially when one comes out of a side street and rams into your car. But one thing we can do to help the adrenals rest and heal is to not stress them one bit by sending them into a panic with a big rush of blood sugar.....by keeping our blood sugar very stable and steady with a blood sugar handling diet. There are a few other things we can do, such as getting plenty of rest, especially sleeping from 7-9 AM if possible, the time when the adrenals rest the most if allowed to. We can stop nudging the poor tired kidney caps to work harder..... by eliminating caffeine and alcohol. I'm not saying that these things necessarily cause the problem, but they will stimulate the adrenals into action and we want them to have rest. It is like a patient coming home from the hospital after a surgery....we don't let the patient stack wood or clean the barn. That doesn't mean that those activities, in moderation, are harmful in themselves....but the patient needs to rest for a period of time before resuming normal activities, and maybe some of those activities will need to be modified forever, depending on the degree of damage and subsequent healing.
I knew that when I got the first functional evaluation in early December, but kept putting off the strict diet. Shortly after that, I started experiencing heart palpitations. In a follow-up evaluation in January, my adrenal function had dropped even lower....close to failure. It was time to do something drastic, and I stopped whining (ok, not really, I actually whined a bit more) and jumped into the hardcore sugar handling diet.
Tomorrow: What we ate and maybe, if you're good, I'll tell you about the results.....
Sunday, January 22, 2012
Anyone can make laundry soap.....really!
Would I lie to you? Never! You can save lots of money, save the environment, save your septic system, and save your health by making your own laundry soap. Let me explain.
 You can save lots of money. The liquid version of homemade laundry soap costs about a penny and a half per load. Even on sale and with a coupon, you are not likely getting the cheapest of the cheap THAT cheap. Those savings add up over the course of the year. And when you run out, you can just whip up another batch, likely without going to the store!
You can save the environment. Well, you can contribute to saving the environment. Each time demand is created for another plastic bottle...and laundry soap jugs contain a lot of plastic...fossil fuels and dangerous chemicals are used. Also, that soap, the bottles, the labels, and the finished product all need to be shipped, using more fossil fuels and polluting this planet even more. Although we can't get away from using gas and plastics completely, we can reduce our own use of these items as much as possible.
You are saving your septic system. OK, I admit I'm a little foggy on this one, but I read it somewhere....
You are saving your health. This one I could go on and on for hours about. Suffice it to say that laundry soaps are a toxic soup of harmful chemicals. Have you noticed that it is difficult to rinse the cap that you might use for measuring out the soap? Ever wonder how much is remaining on your clothing and being absorbed through your skin....and getting into your children's bloodstreams via their tender skin? There has been a trend in laundry soap lately....long-lasting and powerful scents that don't rinse out. I've purchased shirts and sweaters at used clothing stores that made it through many washings before that scent was gone. Those perfuming agents are VERY toxic, whether you are hyper sensitive or not. They build up in your system and do damage in ways that may only show up years later, and then won't be traced back to the source. Nasty stuff.
It is super easy to make. That is the truth, and I made this video to prove it. You will see a batch made from start to finish along with lots of hints and tips that I learned in the years that I've been making our laundry soap. Meanwhile, here are step-by-step instructions:
 You will need:
A bar of laundry soap, such as Fels Naptha, Zote, or home-made laundry soap
Borax
Washing soda
Water
A 2.5-3 quart sauce pan
A whisk or spoon
A 2.5 gallon bucket or container
A funnel (maybe)
A sharp knife and a food processor, OR a cheese grater and patience
Something to measure out half cups of powder and quarts of water
 The first three items might be found at your local grocery store in the laundry aisle. If you don't see them at first, don't give up. I find the laundry bars in with the bath soaps at my grocery store! But the borax and washing soda are in the laundry detergent aisle, on very high or very low shelves....the expensive stuff is always within easy reach.
 If you can't find washing soda, it is also known as pH Up or sodium carbonate and found in the pool section of your local department store or hardware store. Both borax and washing soda are laundry boosters, not laundry detergents. Keep this in mind, because if you have an extra dirty load to wash, you can throw in an extra half cup of either...or both. I used to use borax when washing stinky horse blankets. It was great for neutralizing the smells.
You won't want to use bath or hand soap for this project. Those are made to be gentle on skin, not stripping the oils, and even adding some oils to be moisturizing. You don't want to be adding oils to your laundry! So you want a very harsh soap, and that is what a laundry bar is. Harsh soap, bad for skin but perfect for laundry.
 First, you'll need to grate the soap. You can use a cheese grater....1/3 of a bar of fels naptha will make a two gallon batch of laundry soap, so this method is doable. I make several batches at one time, so I use the knife to cut 1/8 inch slices from the bar....the slices shatter....then I run this coarse soap through the food processor to powder it. I do it in batches....enough for one two gallon batch. Then I add a half cup each of washing soda and borax and mix it together. This will be my basic mix.
 This then needs to be liquified. This step is accomplished by heating two quarts of water in the sauce pan, then adding the powdered mix and stirring patiently until it is completely dissolved. Next, add this to the remaining six quarts of water in your chosen container and mix thoroughly. That is it. Use a half cup of this per load.
 Be forewarned that this liquid will gel quite a bit in the first day or two. If you like a smooth product, you can stir it or shake it occasionally to keep it smooth during the time that it is setting up. Or you can do what I do....keep a one gallon open pail next to your washer and dump a gallon of soap into it as needed. Give it a good stir whenever you refill it, breaking up the globs. I keep a length of wooden dowel on my washer to use for this purpose, and also to push items to be washed under the water if they want to float, keeping my hands out of the water.
A quick caution: If you have white clothing, you may want to keep some purchased laundry detergent handy. Our great-grandmothers used bluing to get their whites looking really white...and you CAN buy bluing in the grocery store, I've seen it! Without bluing, however, your whites will start to look a bit grey after only a few washings. I've simply moved away from whites...it is now only my husband's cotton socks that he wears mostly to work outside, and nobody but me knows they are not blindingly white.
A laundry soap kit, with instructions and a few baggies of the mix, would make a nice gift to someone who has been out of work or fallen on hard times. If you are out of work or struggling financially yourself, it is still a gift you can give that will save the recipient a few dollars (or a lot of dollars if they follow through and make more) without costing you more than a few cents. Give a fish AND teach to fish....the best!
Does anyone else make their own laundry soap?

You can save the environment. Well, you can contribute to saving the environment. Each time demand is created for another plastic bottle...and laundry soap jugs contain a lot of plastic...fossil fuels and dangerous chemicals are used. Also, that soap, the bottles, the labels, and the finished product all need to be shipped, using more fossil fuels and polluting this planet even more. Although we can't get away from using gas and plastics completely, we can reduce our own use of these items as much as possible.
You are saving your septic system. OK, I admit I'm a little foggy on this one, but I read it somewhere....
You are saving your health. This one I could go on and on for hours about. Suffice it to say that laundry soaps are a toxic soup of harmful chemicals. Have you noticed that it is difficult to rinse the cap that you might use for measuring out the soap? Ever wonder how much is remaining on your clothing and being absorbed through your skin....and getting into your children's bloodstreams via their tender skin? There has been a trend in laundry soap lately....long-lasting and powerful scents that don't rinse out. I've purchased shirts and sweaters at used clothing stores that made it through many washings before that scent was gone. Those perfuming agents are VERY toxic, whether you are hyper sensitive or not. They build up in your system and do damage in ways that may only show up years later, and then won't be traced back to the source. Nasty stuff.
It is super easy to make. That is the truth, and I made this video to prove it. You will see a batch made from start to finish along with lots of hints and tips that I learned in the years that I've been making our laundry soap. Meanwhile, here are step-by-step instructions:

A bar of laundry soap, such as Fels Naptha, Zote, or home-made laundry soap
Borax
Washing soda
Water
A 2.5-3 quart sauce pan
A whisk or spoon
A 2.5 gallon bucket or container
A funnel (maybe)
A sharp knife and a food processor, OR a cheese grater and patience
Something to measure out half cups of powder and quarts of water


You won't want to use bath or hand soap for this project. Those are made to be gentle on skin, not stripping the oils, and even adding some oils to be moisturizing. You don't want to be adding oils to your laundry! So you want a very harsh soap, and that is what a laundry bar is. Harsh soap, bad for skin but perfect for laundry.


A quick caution: If you have white clothing, you may want to keep some purchased laundry detergent handy. Our great-grandmothers used bluing to get their whites looking really white...and you CAN buy bluing in the grocery store, I've seen it! Without bluing, however, your whites will start to look a bit grey after only a few washings. I've simply moved away from whites...it is now only my husband's cotton socks that he wears mostly to work outside, and nobody but me knows they are not blindingly white.
A laundry soap kit, with instructions and a few baggies of the mix, would make a nice gift to someone who has been out of work or fallen on hard times. If you are out of work or struggling financially yourself, it is still a gift you can give that will save the recipient a few dollars (or a lot of dollars if they follow through and make more) without costing you more than a few cents. Give a fish AND teach to fish....the best!
Does anyone else make their own laundry soap?
Saturday, January 21, 2012
Quick-quick-quick sausage soup
Just made a quick soup and it is DELISH!

Here's what I did....and bear in mind that most of the ingredients and amounts are adjustable to your tastes. I'll go into detail for beginner cooks and give a few shortcuts for busy cooks.
First, turn the heat on under your pan. Toss in some diced salt pork or bacon, or a spoonful of lard, bacon grease, saved chicken fat, whatever you have. I used salt pork since I have lots and am craving it, likely for the vitamin D. Put a kettle of water on to boil with at least 2 cups of water in it, more if you'll be making yourself a cup of tea at the same time. I always do.
While your pan is heating up and the fat is releasing from the bacon or salt pork, take your sausage out of the freezer and run the package under a bit of warm water to thaw a bit. This is assuming it is in a waterproof package, as mine was. I used the spicy sausage I made with the livers and hearts (20%) and fatty pork scraps (80%) during processing week and froze in easy portions in Ziploc freezer bags. You can use already thawed sausage if you have some in your fridge.

Then dice up a half an onion (or used frozen diced onions) and a few cloves of garlic (or use minced garlic in a jar...preferably some you previously minced and fermented and not the kind I used to buy that is full of preservatives).
If your pan is hot and well greased by now, throw in the sausage and crumble it as it thaws and cooks. Get that flame up med-high and get that meat well-browned for extra flavor. When it is almost browned to your liking, toss in the onions and garlic. Cook until a bit translucent and not so white looking.
Add some of the boiling water from your kettle, being careful not to burn your hand in the resulting steam. When it settles down a bit, stir and scrape and stir some more, getting all the nice browned bits that were stuck on the bottom of your pan. Turn the heat down to a simmer.
 Add a handful of chopped scallions (green part, or both green and white parts. I think scallions are a major key to a flavorful broth. Always have some in your freezer in ziplocs, washed, chopped, and ready to toss into quick soups.) and a half of a red pepper, diced. Add a tablespoon or so each of sage and parsley and salt to taste.

Add a quart of broth. Again, having frozen, unflavored broths of various types in my freezer at all times is a major priority. I don't flavor broth when making it so it will be more versatile. I flavor it when using it, as in this soup. I used a quart of pork broth, made in the traditional manner with bones from our pastured pigs.

Simmer this, covered, for about 15 minutes to blend the flavors of the herbs and cook the scallions. Then add a full bag of frozen chopped spinach or any other greens you'd like, and simmer until done. Adjust your salt and pepper and serve.
This was made to be compatible with the strict sugar handling diet. Otherwise, I'd use far less spinach and add other veggies, such as carrots and rutabagas and chard stems (celery would be great, but celery doesn't like me so I use chard stems, sliced, blanched, and frozen from the garden. I'd have used them today but I ran out last week.) Soups are so versatile.....but some things I rarely change when making soups: homemade traditional bone broths as the base, scallions with or without onions, and garlic. Then herbs to flavor it....rosemary for chicken soup, sage paired well with the sausage and would go great with any pork, and Italian herbs such as oregano and basil for a more Italian flavor, adding a bay leaf with beef.....these are some basics that I rarely waver from when making a quick soup.

To sum up, here is what I used to make my soup today:
3/4 lb hot sausage
1/2 medium onion, diced
3-4 cloves garlic, minced
handful of chopped green onions (scallions)
half a red pepper, diced
1 Tbsp rubbed sage
1 Tbsp parsley flakes
1.5 tsp sea salt
1 quart pork broth
1 lb frozen chopped spinach
Once I can add cheese back into my diet (Tomorrow! Tomorrow! I love you, tomorrow, you're only a day away!) this soup would be fantastic with a sharp cheese sprinkled on top when serving....parmesan, Romano, or my choice, a nicely aged feta.
Isn't soup the perfect food for a cold and snowy winter's day?

Here's what I did....and bear in mind that most of the ingredients and amounts are adjustable to your tastes. I'll go into detail for beginner cooks and give a few shortcuts for busy cooks.
First, turn the heat on under your pan. Toss in some diced salt pork or bacon, or a spoonful of lard, bacon grease, saved chicken fat, whatever you have. I used salt pork since I have lots and am craving it, likely for the vitamin D. Put a kettle of water on to boil with at least 2 cups of water in it, more if you'll be making yourself a cup of tea at the same time. I always do.
While your pan is heating up and the fat is releasing from the bacon or salt pork, take your sausage out of the freezer and run the package under a bit of warm water to thaw a bit. This is assuming it is in a waterproof package, as mine was. I used the spicy sausage I made with the livers and hearts (20%) and fatty pork scraps (80%) during processing week and froze in easy portions in Ziploc freezer bags. You can use already thawed sausage if you have some in your fridge.

Then dice up a half an onion (or used frozen diced onions) and a few cloves of garlic (or use minced garlic in a jar...preferably some you previously minced and fermented and not the kind I used to buy that is full of preservatives).
If your pan is hot and well greased by now, throw in the sausage and crumble it as it thaws and cooks. Get that flame up med-high and get that meat well-browned for extra flavor. When it is almost browned to your liking, toss in the onions and garlic. Cook until a bit translucent and not so white looking.
Add some of the boiling water from your kettle, being careful not to burn your hand in the resulting steam. When it settles down a bit, stir and scrape and stir some more, getting all the nice browned bits that were stuck on the bottom of your pan. Turn the heat down to a simmer.


Add a quart of broth. Again, having frozen, unflavored broths of various types in my freezer at all times is a major priority. I don't flavor broth when making it so it will be more versatile. I flavor it when using it, as in this soup. I used a quart of pork broth, made in the traditional manner with bones from our pastured pigs.

Simmer this, covered, for about 15 minutes to blend the flavors of the herbs and cook the scallions. Then add a full bag of frozen chopped spinach or any other greens you'd like, and simmer until done. Adjust your salt and pepper and serve.
This was made to be compatible with the strict sugar handling diet. Otherwise, I'd use far less spinach and add other veggies, such as carrots and rutabagas and chard stems (celery would be great, but celery doesn't like me so I use chard stems, sliced, blanched, and frozen from the garden. I'd have used them today but I ran out last week.) Soups are so versatile.....but some things I rarely change when making soups: homemade traditional bone broths as the base, scallions with or without onions, and garlic. Then herbs to flavor it....rosemary for chicken soup, sage paired well with the sausage and would go great with any pork, and Italian herbs such as oregano and basil for a more Italian flavor, adding a bay leaf with beef.....these are some basics that I rarely waver from when making a quick soup.

To sum up, here is what I used to make my soup today:
3/4 lb hot sausage
1/2 medium onion, diced
3-4 cloves garlic, minced
handful of chopped green onions (scallions)
half a red pepper, diced
1 Tbsp rubbed sage
1 Tbsp parsley flakes
1.5 tsp sea salt
1 quart pork broth
1 lb frozen chopped spinach
Once I can add cheese back into my diet (Tomorrow! Tomorrow! I love you, tomorrow, you're only a day away!) this soup would be fantastic with a sharp cheese sprinkled on top when serving....parmesan, Romano, or my choice, a nicely aged feta.
Isn't soup the perfect food for a cold and snowy winter's day?
Thursday, January 19, 2012
Comfort food on a strict diet
Meatloaf!
 Peter and I are about 12 days in on the sugar handling diet. More on this later. Suffice it to say it is super strict and a very important step in regaining control of our health.....naturally.
One of the big challenges has been the requirement to eat every 2-3 hours, each meal (at least 6 meals per day) containing 4-6 oz of a high quality protein. That didn't sound so daunting when we started this, but after a few days we both found it challenging to have enough food prepared in advance to be able to do this with our busy schedules. In the beginning we were highly dependent on chicken soup and boiled eggs for the quickest meals, and standard fare for the meals where we could slow down more and really cook.
Then it hit me: meatloaf....and meatballs. Both can be eaten hot or cold, and made in advance. Both are yummy and can be served in a number of ways so they don't become boring. Best of all, I could use some of that pork that is in my freezers.
Since the latest research, reported in October 2011 by the Weston A. Price Foundation, says the pork is best health-wise when marinated with vinegar (pork fat is fine, as in salt pork, bacon, and lard), I've been pondering how to make my favorite recipes while incorporating this important step.
After thawing a couple of boneless roasts and grinding them with my trusty KitchenAid with the meat grinder attachment, I added a few glugs of Bragg's raw apple cider vinegar. After mixing it in thoroughly, I set it on my cold porch to marinate for the day. I ground up a few pounds of grass-fed beef to mix with it, in a 2:1 ratio of pork to beef. Only because my pork was pastured and very, very inexpensive and the grass-fed beef was more pricy. You can use all beef, too.
I added finely diced onion and garlic, and some chopped dried mushrooms I wanted to use up. A few raw eggs, salt and pepper, oregano and parsley, and it was starting to smell good, even raw.
 I baked it at 350 F for just over an hour, until a meat thermometer pushed into the center of the loaf registered over 160 F.
The rest of the mix was packed into two more loaf pans and frozen, and scooped out into meatballs and baked on a cookie sheet for about 30 minutes.
Peter is teaching tonight at the massage school and he took a bowl of the fresh tomato salsa I made this morning along with a few of the cold meatballs. A perfect and tasty quick meal on the go. I'm having green beans sauteed with salt pork and a few meatballs here at home. YUM! We already polished off the original meatloaf, it was that good.
I may have to go take those frozen meatloaves out already.......and they are probably not even frozen through yet!
Show of hands....who likes meatloaf?

One of the big challenges has been the requirement to eat every 2-3 hours, each meal (at least 6 meals per day) containing 4-6 oz of a high quality protein. That didn't sound so daunting when we started this, but after a few days we both found it challenging to have enough food prepared in advance to be able to do this with our busy schedules. In the beginning we were highly dependent on chicken soup and boiled eggs for the quickest meals, and standard fare for the meals where we could slow down more and really cook.
Then it hit me: meatloaf....and meatballs. Both can be eaten hot or cold, and made in advance. Both are yummy and can be served in a number of ways so they don't become boring. Best of all, I could use some of that pork that is in my freezers.
Since the latest research, reported in October 2011 by the Weston A. Price Foundation, says the pork is best health-wise when marinated with vinegar (pork fat is fine, as in salt pork, bacon, and lard), I've been pondering how to make my favorite recipes while incorporating this important step.
After thawing a couple of boneless roasts and grinding them with my trusty KitchenAid with the meat grinder attachment, I added a few glugs of Bragg's raw apple cider vinegar. After mixing it in thoroughly, I set it on my cold porch to marinate for the day. I ground up a few pounds of grass-fed beef to mix with it, in a 2:1 ratio of pork to beef. Only because my pork was pastured and very, very inexpensive and the grass-fed beef was more pricy. You can use all beef, too.
I added finely diced onion and garlic, and some chopped dried mushrooms I wanted to use up. A few raw eggs, salt and pepper, oregano and parsley, and it was starting to smell good, even raw.

The rest of the mix was packed into two more loaf pans and frozen, and scooped out into meatballs and baked on a cookie sheet for about 30 minutes.
Peter is teaching tonight at the massage school and he took a bowl of the fresh tomato salsa I made this morning along with a few of the cold meatballs. A perfect and tasty quick meal on the go. I'm having green beans sauteed with salt pork and a few meatballs here at home. YUM! We already polished off the original meatloaf, it was that good.
I may have to go take those frozen meatloaves out already.......and they are probably not even frozen through yet!
Show of hands....who likes meatloaf?
Thursday, January 12, 2012
Craving a fatty and salt snack?
Bacon!!!
 OK, I confess, that is not bacon. The bacon won't be ready for another two weeks. But I was really, really craving a salty snack dripping in fat, and since popcorn with butter and feta is off the menu for another couple of weeks....AND....I found out I wasn't supposed to be eating dairy products for at least two weeks (sniffle).....I had to improvise.
All I kept thinking about was the salt pork I have in large but dwindling amounts. I thought about it a bit, felt the idea was ridiculous, then finally decided to listen to my cravings when they are for healthy foods. I made this salt pork with good sea salt, and it is from our pastured pigs, so it is a healthy food.
 I cut it into a bigger dice than I usually do, since I wanted it to hang onto more of its fat. I fried it in its own fats in my small (7 inch) cast iron pan (Wagner....my favorite!) It sounded lovely, all sizzling and bubbling. My mouth watered in anticipation. Cooking your own food is important to digestion...the sights, sounds, and smells help to prepare your body naturally for what is coming next....real food!
 Drained on a paper towel, my decadent amount of salt pork turned into a teensy snack, but oh, so good!
 So tender and crispy and satisfying in a way that commercial chips or snacks never can be. They were a bit too salty, even for me. I seem to recall my Memere simmering the salty fat in water for a bit to remove some of the salt....I'll have to ask about that. That means I'll have to try it again....oh, joy!
The fat that rendered out of them will be strained through a small wire tea strainer and put into a jar in the fridge, marked salt pork fat, and used for cooking something that can use a bit of salt, too. It rendered out beautifully, and is far too precious to waste.
Admit it, this makes you say "YUM!" Do you have any weird or unusual snacks that you'd like to confess?

All I kept thinking about was the salt pork I have in large but dwindling amounts. I thought about it a bit, felt the idea was ridiculous, then finally decided to listen to my cravings when they are for healthy foods. I made this salt pork with good sea salt, and it is from our pastured pigs, so it is a healthy food.


The fat that rendered out of them will be strained through a small wire tea strainer and put into a jar in the fridge, marked salt pork fat, and used for cooking something that can use a bit of salt, too. It rendered out beautifully, and is far too precious to waste.
Admit it, this makes you say "YUM!" Do you have any weird or unusual snacks that you'd like to confess?
Tuesday, January 10, 2012
Laundry soap experiment
This is how our great-great-grandmothers made soap for laundry....with lard or tallow, lye, and water. I'm on a mission to find out how my own Memere made soap....and how she did other things that she needed to do to keep a family of 13 people fed and clothed and clean.
 I just got the phone number for my eldest aunt on my father's side and hope to have a series of conversations about how their mother, my Memere, made soap and other kitchen and gardening tasks. Meanwhile, the internet is a great resource.
I've been making goat's milk soap for some time now, using only food-grade ingredients (except my pine tar soap, of course!) This soap does not dry the skin like most commercial soaps do. It also is does not contain any petroleum products. It is, however, super-fatted so is not the best for laundry.
When oils are mixed with a lye/water solution (or lye/goat's milk), a chemical reaction takes place. The lye reacts with the oils and saponification occurs. This simply means that the lye turns the oils into soap. Lye used to be sold as drain cleaner, and is very caustic. So the proportion of fats to lye is critical. You don't want the soap to be caustic and drying by using too much lye. However, if too little is used, a lot of the oils will remain and you will have a greasy bar of soap that is vulnerable to rancidity.
A super-fatted soap, one perfect for bathing babies (and adults) and washing your face with, contains just a bit of unsaponified oils. The fat in goat's milk is unique and if used in correct proportions, will produce the most lovely, mild soap.
Clothes don't benefit from moisturizing soaps, though, so this batch of soap is a teensy bit heavy on the lye. It will be too harsh to wash hands or bodies with, but perfect for use in the washing machine. Maybe even the dishwasher. I'll let you know in three weeks. That is how long it takes, on average, for the saponification of all the oils to be complete. Then I will grate some up and make a batch of laundry soap.
I've been making my own inexpensive laundry detergent using Fels Naptha, borax, and washing soda for some time now, at considerable savings to my wallet but also to the environment. All those items are sold in paper or cardboard packaging, and I supply my own plastic containers, used over and over again, to make up the batches of liquid laundry detergent. Not paying for all the water, fancy packaging, toxic perfumes brings my cost for each load to 1.4 cents. Yup. 1.4 cents. Homemade soap will bring that down to under a penny a load. But that is not why I did it.....like many people, I get great satisfaction by doing things myself and trying new things.
Got any projects going? Finished? In the planning stages?
UPDATE: I've been using this for some time now and it is the BEST laundry soap ever! It makes the laundry smell like a spring day, even though it is unscented. Hung outside on a clothesline, this wonderful smell is really strong. But even hung inside near the woodstove in winter, the laundry smell like it was hung outside. I hope to market this soap soon, maybe by the end of February 2014, so watch for the announcement on this blog if you are interested....sign up for notifications via email of new blog posts!
Monday, January 9, 2012
Chai latte.....total yum!
Now, I warn you, I've never actually had chai latte, or any other latte, for that matter. My digestive system just will not tolerate commercial dairy products....only fresh, raw goat's milk. Hubster and I are on day two of a rather strict dietary protocol for healing the bodies' ability to handle blood sugar, along with a component of adrenal healing. No caffeine, no sugar, among other things....so no hot chocolate for breakfast for me! (Whine....)
Since I've never had it, I don't know if I got it "right...." Here is what I came up with:
 What you see above is the chai latte warming up in a stainless steel bowl set on a pan of simmering water. We don't use the microwave anymore....we weaned ourselves off by first not nuking anything with protein in it, including milk. Altered proteins are neuro-toxic. That's your brain cells, by the way. I want all of mine to remain intact, thank-you-very-much.
The double boiler method is a gentle way of warming milk....and leftovers....carefully. I picked up a bunch of small and medium bowls just for this purpose. It takes only 3-4 minutes, not much longer than the microwave, really. I test the milk by sticking a finger in it every minute or so until it is warm but not pasteurized.
To make the chai latte, I used this recipe for chai tea concentrate. I always have this in the fridge, so I filled a mug one third full of chai concentrate, added a few drops of stevia, and filled the mug with goat's milk (any milk will do.) I poured it into the bowl to heat up, then back into the mug. Sprinkle a pinch of some powdered spice on top for a nice touch....cinnamon, nutmeg, allspice....whatever you like.
 It was surprisingly good. Even the hubby liked it, which is very unusual. He's not much of a fan of any hot drinks, so this says a lot for this blend.
What's your favorite healthy treat?
Since I've never had it, I don't know if I got it "right...." Here is what I came up with:

The double boiler method is a gentle way of warming milk....and leftovers....carefully. I picked up a bunch of small and medium bowls just for this purpose. It takes only 3-4 minutes, not much longer than the microwave, really. I test the milk by sticking a finger in it every minute or so until it is warm but not pasteurized.
To make the chai latte, I used this recipe for chai tea concentrate. I always have this in the fridge, so I filled a mug one third full of chai concentrate, added a few drops of stevia, and filled the mug with goat's milk (any milk will do.) I poured it into the bowl to heat up, then back into the mug. Sprinkle a pinch of some powdered spice on top for a nice touch....cinnamon, nutmeg, allspice....whatever you like.

What's your favorite healthy treat?
Sunday, January 8, 2012
PR Pork Roast
Puerto Rican pork roast, that is!
 Isn't that a thing of beauty? Look at that layer of lovely fat! Now that is going to be one moist, succulent roast!
I'm not sure what the recipe is really called, but I got it from my half PR sister-in-law and she got it from her PR grandmother, and that is what she called it when she told me how to make it. There were two versions she learned, one called for key lime juice and the other called for white vinegar. I switched it to raw apple cider vinegar, since I prefer it to the harshness of the distilled grain vinegar that is white vinegar. One day, after I bottle my current batch of onion wine, I'll make a gallon of onion wine vinegar to use in this recipe and others.
A recent study utilizing dark field microscopy indicated that uncured pork, even from properly raised pastured pigs, will cause a stickiness of the blood for many hours after eating it. This can create a dangerous situation for anyone with compromised health....and we all have compromised health nowadays! Since we will be eating a lot of pork in this household in the upcoming months, I will be exploring more ways of using vinegar marinades, which neutralize this bad effect on our cardiovascular system. Super-antioxidants will have the opposite effect, creating a healthy blood flow within minutes of ingesting them. Therefore it might be wise to have some OPC-3 with a meal of uncured or unmarinated pork. Or you might serve elderberry wine with it or elderberry pie for dessert.
Now the recipe: You will need a nice fatty pork roast. The cheaper cuts work the best, especially those with a nice layer of fat. I used a sirloin roast only because our hog freezer is so full and it was the first one I could pry out of the packed shelves that was the appropriate size.....without being buried in a pork avalanche. My recipe calls for a five pound roast, but you can use anything you have. Just adjust the recipe for the adobo accordingly, and the cooking time.
For the adobo (marinade) you will need fresh garlic, powdered oregano (you can powder any oregano you have with a mortar and pestle), salt and pepper, vinegar and olive oil.
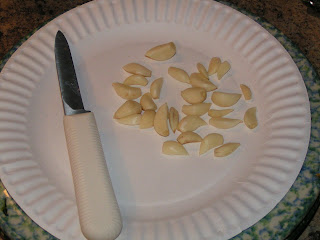
I had garlic from my garden. Since the cloves were on the small side, I peeled more than twelve of them, but the recipe called for twelve cloves of garlic, crushed in the mortar and pestle. My sister-in-law tells me that a wooden one is traditional, and the garlic is less likely to try to escape while you are pounding it. I have a marble one, so I add something from the dry ingredients to help control the frisky garlic. Here I used the salt and pepper.
 Next, add a tablespoon of powdered oregano. I had whole leaf oregano from the garden. It keeps its flavor best if stored as whole as possible, so I rubbed it down in my hands in batches before powdering it.
 Next, add a couple tablespoons of extra virgin olive oil and a quarter cup of vinegar, mix well.
 Cut slits in the roast on all sides....I mostly just poked it with a sharp knife. It was kinda fun, I admit. Then rub in some of the adobo, massaging well until the pork is relaxed and stress-free.
 Either put the rest of the adobo on the roast, distributing it as evenly as possible and cover and refrigerate, or put it into a Ziploc freezer bag and refrigerate overnight. Turn the roast now and then and redistribute the adobo as necessary.
 The next day, roast it uncovered at 350 F for 2-2.5 hours, basting occasionally. Just plop it in a pan:
 Roast for the appropriate amount of time for the size roast you chose. I roasted this one for about 2.5 hours, then let it rest for a while while I finished the veggies (beets and green beans.) I basted twice....it wasn't really necessary with that thick layer of fat. If you have a store bought roast that is a bit lean, you will want to baste every 30-45 minutes or so.
It smelled so good that we dove into it before I remembered to take a picture:

I've been known to pick off the crust and eat it, bit by bit, when the roast comes out of the oven, it is that good. This is great with collards or other hearty greens on the side, and rice and beans if you like. It is wonderful in cold or hot sandwiches, too. I like a bit of homemade fermented mustard on mine and a slab of Caerphilly cheese. Sure, go ahead, have a multi-cultural lunch. Most of us are pretty multi-cultural ourselves....my family sure is!
What foods do you enjoy from lands near or far?

I'm not sure what the recipe is really called, but I got it from my half PR sister-in-law and she got it from her PR grandmother, and that is what she called it when she told me how to make it. There were two versions she learned, one called for key lime juice and the other called for white vinegar. I switched it to raw apple cider vinegar, since I prefer it to the harshness of the distilled grain vinegar that is white vinegar. One day, after I bottle my current batch of onion wine, I'll make a gallon of onion wine vinegar to use in this recipe and others.
A recent study utilizing dark field microscopy indicated that uncured pork, even from properly raised pastured pigs, will cause a stickiness of the blood for many hours after eating it. This can create a dangerous situation for anyone with compromised health....and we all have compromised health nowadays! Since we will be eating a lot of pork in this household in the upcoming months, I will be exploring more ways of using vinegar marinades, which neutralize this bad effect on our cardiovascular system. Super-antioxidants will have the opposite effect, creating a healthy blood flow within minutes of ingesting them. Therefore it might be wise to have some OPC-3 with a meal of uncured or unmarinated pork. Or you might serve elderberry wine with it or elderberry pie for dessert.
Now the recipe: You will need a nice fatty pork roast. The cheaper cuts work the best, especially those with a nice layer of fat. I used a sirloin roast only because our hog freezer is so full and it was the first one I could pry out of the packed shelves that was the appropriate size.....without being buried in a pork avalanche. My recipe calls for a five pound roast, but you can use anything you have. Just adjust the recipe for the adobo accordingly, and the cooking time.
For the adobo (marinade) you will need fresh garlic, powdered oregano (you can powder any oregano you have with a mortar and pestle), salt and pepper, vinegar and olive oil.

I had garlic from my garden. Since the cloves were on the small side, I peeled more than twelve of them, but the recipe called for twelve cloves of garlic, crushed in the mortar and pestle. My sister-in-law tells me that a wooden one is traditional, and the garlic is less likely to try to escape while you are pounding it. I have a marble one, so I add something from the dry ingredients to help control the frisky garlic. Here I used the salt and pepper.


It smelled so good that we dove into it before I remembered to take a picture:

I've been known to pick off the crust and eat it, bit by bit, when the roast comes out of the oven, it is that good. This is great with collards or other hearty greens on the side, and rice and beans if you like. It is wonderful in cold or hot sandwiches, too. I like a bit of homemade fermented mustard on mine and a slab of Caerphilly cheese. Sure, go ahead, have a multi-cultural lunch. Most of us are pretty multi-cultural ourselves....my family sure is!
What foods do you enjoy from lands near or far?
Friday, January 6, 2012
I hate beets! Or do I?
Beets. Blech. Taste like dirt.
Unless......
 They are cooked with salt pork! Everything is better with salt pork. Seriously, though, I do not like beets. However, they were one of the few vegetables that did well in the garden this year, and there they were, in my cellar, mocking me. And shriveling. I needed to bite the bullet and cook some up.
I admit I didn't really know how to cook them, so I did an internet search and came up with....nothing that sounded appealing. I did learn that I needed to cook them in some way first to remove the skins, and then cook them some more in my chosen method. Today both the hubster and I were running in many directions with very little time and would be getting home from work around 7:30, with hungry animals to care for. So I scrubbed three large beets, trimmed the very top off as well as the long hairy roots, and tossed them into the smaller Dutch oven and put it on the woodstove for six hours. That should either take care of the first cooking, or char the beets enough that I could say, well, I tried. And toss them out to the hens.
I also parboiled two small potatoes from the garden, and diced them up. I took out enough cooked corned beef from the freezer to make hash as the main dish. We'd find something green to round out the meal later. Off we went to work.
The beets had roasted perfectly in our absence (drat!) so I peeled and diced them while some salt pork was frying. I added the beets, then got the potatoes into a hot pan of melted lard. I like to brown the potatoes a bit before adding the corned beef, so the 'taters are crispy without the beef getting dried out.
 Meanwhile, hubby got some frozen grocery store spinach in the steamer and unloaded and re-loaded the dishwasher. Home cooking does produce a lot of dirty dishes, and we both work hard to keep on top of them. On a busy day, however, we do get behind. I'd far rather come home to a sinkful of dirty dishes than resort to take-out food, however. Sometimes something just has to give, and I'd rather it be housekeeping than proper food. The dishes will eventually get washed, and good health must be prioritized. Once lost, it is a struggle to regain.
After a few minutes, I added the chopped corned beef and browned it. It absorbed all of the grease right away, so I added another glob of our precious high-vitamin lard.

Within about an hour of arriving home, the goats were fed and watered, the chickens were put to bed, the dishes were in the dishwasher, and we were eating this:
 I must say, those beets were so delicious that I went back for seconds. These were nothing like any beets I'd ever eaten before. Was it because they were home grown? Was it the cooking method? Who knows, but it will be a sad day when the box of beets in the basement is empty. Never thought I'd say that. Never thought Peter would agree.
What is your favorite way to eat beets?
Unless......

I admit I didn't really know how to cook them, so I did an internet search and came up with....nothing that sounded appealing. I did learn that I needed to cook them in some way first to remove the skins, and then cook them some more in my chosen method. Today both the hubster and I were running in many directions with very little time and would be getting home from work around 7:30, with hungry animals to care for. So I scrubbed three large beets, trimmed the very top off as well as the long hairy roots, and tossed them into the smaller Dutch oven and put it on the woodstove for six hours. That should either take care of the first cooking, or char the beets enough that I could say, well, I tried. And toss them out to the hens.
I also parboiled two small potatoes from the garden, and diced them up. I took out enough cooked corned beef from the freezer to make hash as the main dish. We'd find something green to round out the meal later. Off we went to work.
The beets had roasted perfectly in our absence (drat!) so I peeled and diced them while some salt pork was frying. I added the beets, then got the potatoes into a hot pan of melted lard. I like to brown the potatoes a bit before adding the corned beef, so the 'taters are crispy without the beef getting dried out.

After a few minutes, I added the chopped corned beef and browned it. It absorbed all of the grease right away, so I added another glob of our precious high-vitamin lard.

Within about an hour of arriving home, the goats were fed and watered, the chickens were put to bed, the dishes were in the dishwasher, and we were eating this:

What is your favorite way to eat beets?
Sunday, January 1, 2012
The secret of flavor

Salting meat was a method of preservation used in the days before refrigeration. My Memere would salt all meaty chunks of fat and store it in a crock in the cool cellar where it would be available year round. We do the same, except we have a "fermenting fridge" in our basement. With modern mechanicals in many cellars nowadays, such as the furnace, hot water heater, and the washer and dryer, it is a rare cellar that maintains a constant cool temperature suitable for safe food storage. This is where the second fridge comes in handy.
What you use to make salt pork is a matter of preference. I like the forward end of the bacon, the part that is on the shoulder quarter that gets doesn't end up with the bacon. This will make sense to you if you cut up a side of hog on your own. Otherwise, just trust me on this one.
That little bit of lost bacon won't be enough to prepare a year of meals requiring salt pork, however, so I tossed any nicely marbled piece of fat into the bucket destined for making salt pork as we did the butchering. Some were just fat with no meat....I chose pieces that seemed firmer to the touch, that would dice well, putting softer pieces into the grinder for lard. Chunks of fat that looked suitable were added to the pail, no matter where on the pig they came from.
Dad likes to use meatier salt pork, so he chose fatty meat....I chose meaty fat. Jack Spratt, and all that!
If you don't happen to be butchering a pig yourself, you can use any fatty cut you can purchase. Boneless country style ribs make great salt pork. The fat trimmed from very fatty chops can be used....Hey, salt down a few chops while you're at it, especially if you like meaty salt pork. Just be sure there is plenty of fat, so trimmed bits work great. You can salt them in a small jar or bowl in your fridge. No need to make 4-5 gallons like I did. I do tend to lose control when it comes to anything even remotely resembling bacon!

These pictures were taken a few days later, when I brought the jars up from the cellar to add some brine and weight down the pork. You can actually do this all on the first day you make it. I didn't, because the big jars I wanted to use were occupied and needed cleaning, so I started my salt pork in several gallon jars and then re-packed it into these two 2.5 gallon jars for longer storage.
If you don't have a crock with a weight made for the crock, you can use the handy-dandy Ziploc freezer bag. Or a large scrubbed and boiled brick or rock. Or a rock and a plate if you have one that fits in your container. Or a canning jar filled with water instead of the rock. The possibilities are endless.....your goal is simply to keep that floating fat immersed completely underneath the brine at all times. Air = decay. We don't want that.

Wait about 10-14 days before using any of the pork, giving the salt time to draw much of the water out and for some of the salt to penetrate and flavor the pork.
The type of salt you use is also a consideration. Ideally, a good sea salt is used such as Celtic brand, any of the pink Himalayan salts, Redmond Real Salt, or as we did, home made sea salt (that is another story altogether!) Quality salt is an important nutrient and it is worth the extra expense for this purpose. Fat from pasture pigs, coupled with high quality salt, will yield superior health benefits. Save money elsewhere (buy cheap toilet paper, I always say!) and splurge here. You are worth it.
Subscribe to:
Posts (Atom)